How to Build A Farmhouse Table
Adam Koons
Affiliate Disclosure: Thank you supporting us by visiting our site and posts. This website contains affiliate links that are ads recommended to you, that we can earn a small payout on. We only use Amazon Associates and Google Adsense. By clicking on these ads, making a purchase, or taking other action, we can earn a little extra money to fund future projects.
Farmhouse Tables Are Great. Period.
They are big. They are welcoming and inviting. They can accommodate a large number of people to sit around them. They are great to use for household chores like folding laundry, or spreading out papers.
However, they are often expensive to purchase. Farmhouse tables come in so many different sizes and styles, it can be tricky to find the exact one to fit your space perfectly.
So we built a farmhouse table.
The internet is filled with free farmhouse table plans. Simply search "DIY Farmhouse Table" or "Farmhouse Table Plans" on Pinterest, and the internet will give you more than you need! Some will be great, and others... well they are free.
So here is a guide to make building a farmhouse table simple and easy. You can adopt the other plans with this "how to assemble" guide, and you will have yourself a great sturdy table!
So first, here is what the previous owners of our home had for a formal dining room, and here is what a farmhouse table will do for your space!

Previous Owners Formal Dining Room

Farmhouse Table in Formal Dining Room!
Hickory Farmhouse Table with White Base
Farmhouse Table DIY

Once we had an idea of the style for the farmhouse table, we ordered some "beefy" legs online. They were the perfect height and style for what we wanted, and there were so many shapes and styles available.
Once we received the legs, we started on the table frame or apron. Since we planned on painting the table base, we used cost effective 2x4s to build our table. First, we ripped the round edge off of one side of the 2x4s to have a square board to work off of. I like the appearance of the squareness better than the round edge.
After ripping the wood, we built the frame by putting 2 pocket holes in the end of each board with a Kreg Pocket Hole Jig. The pocket hole screws, along with some glue, held everything together nicely!
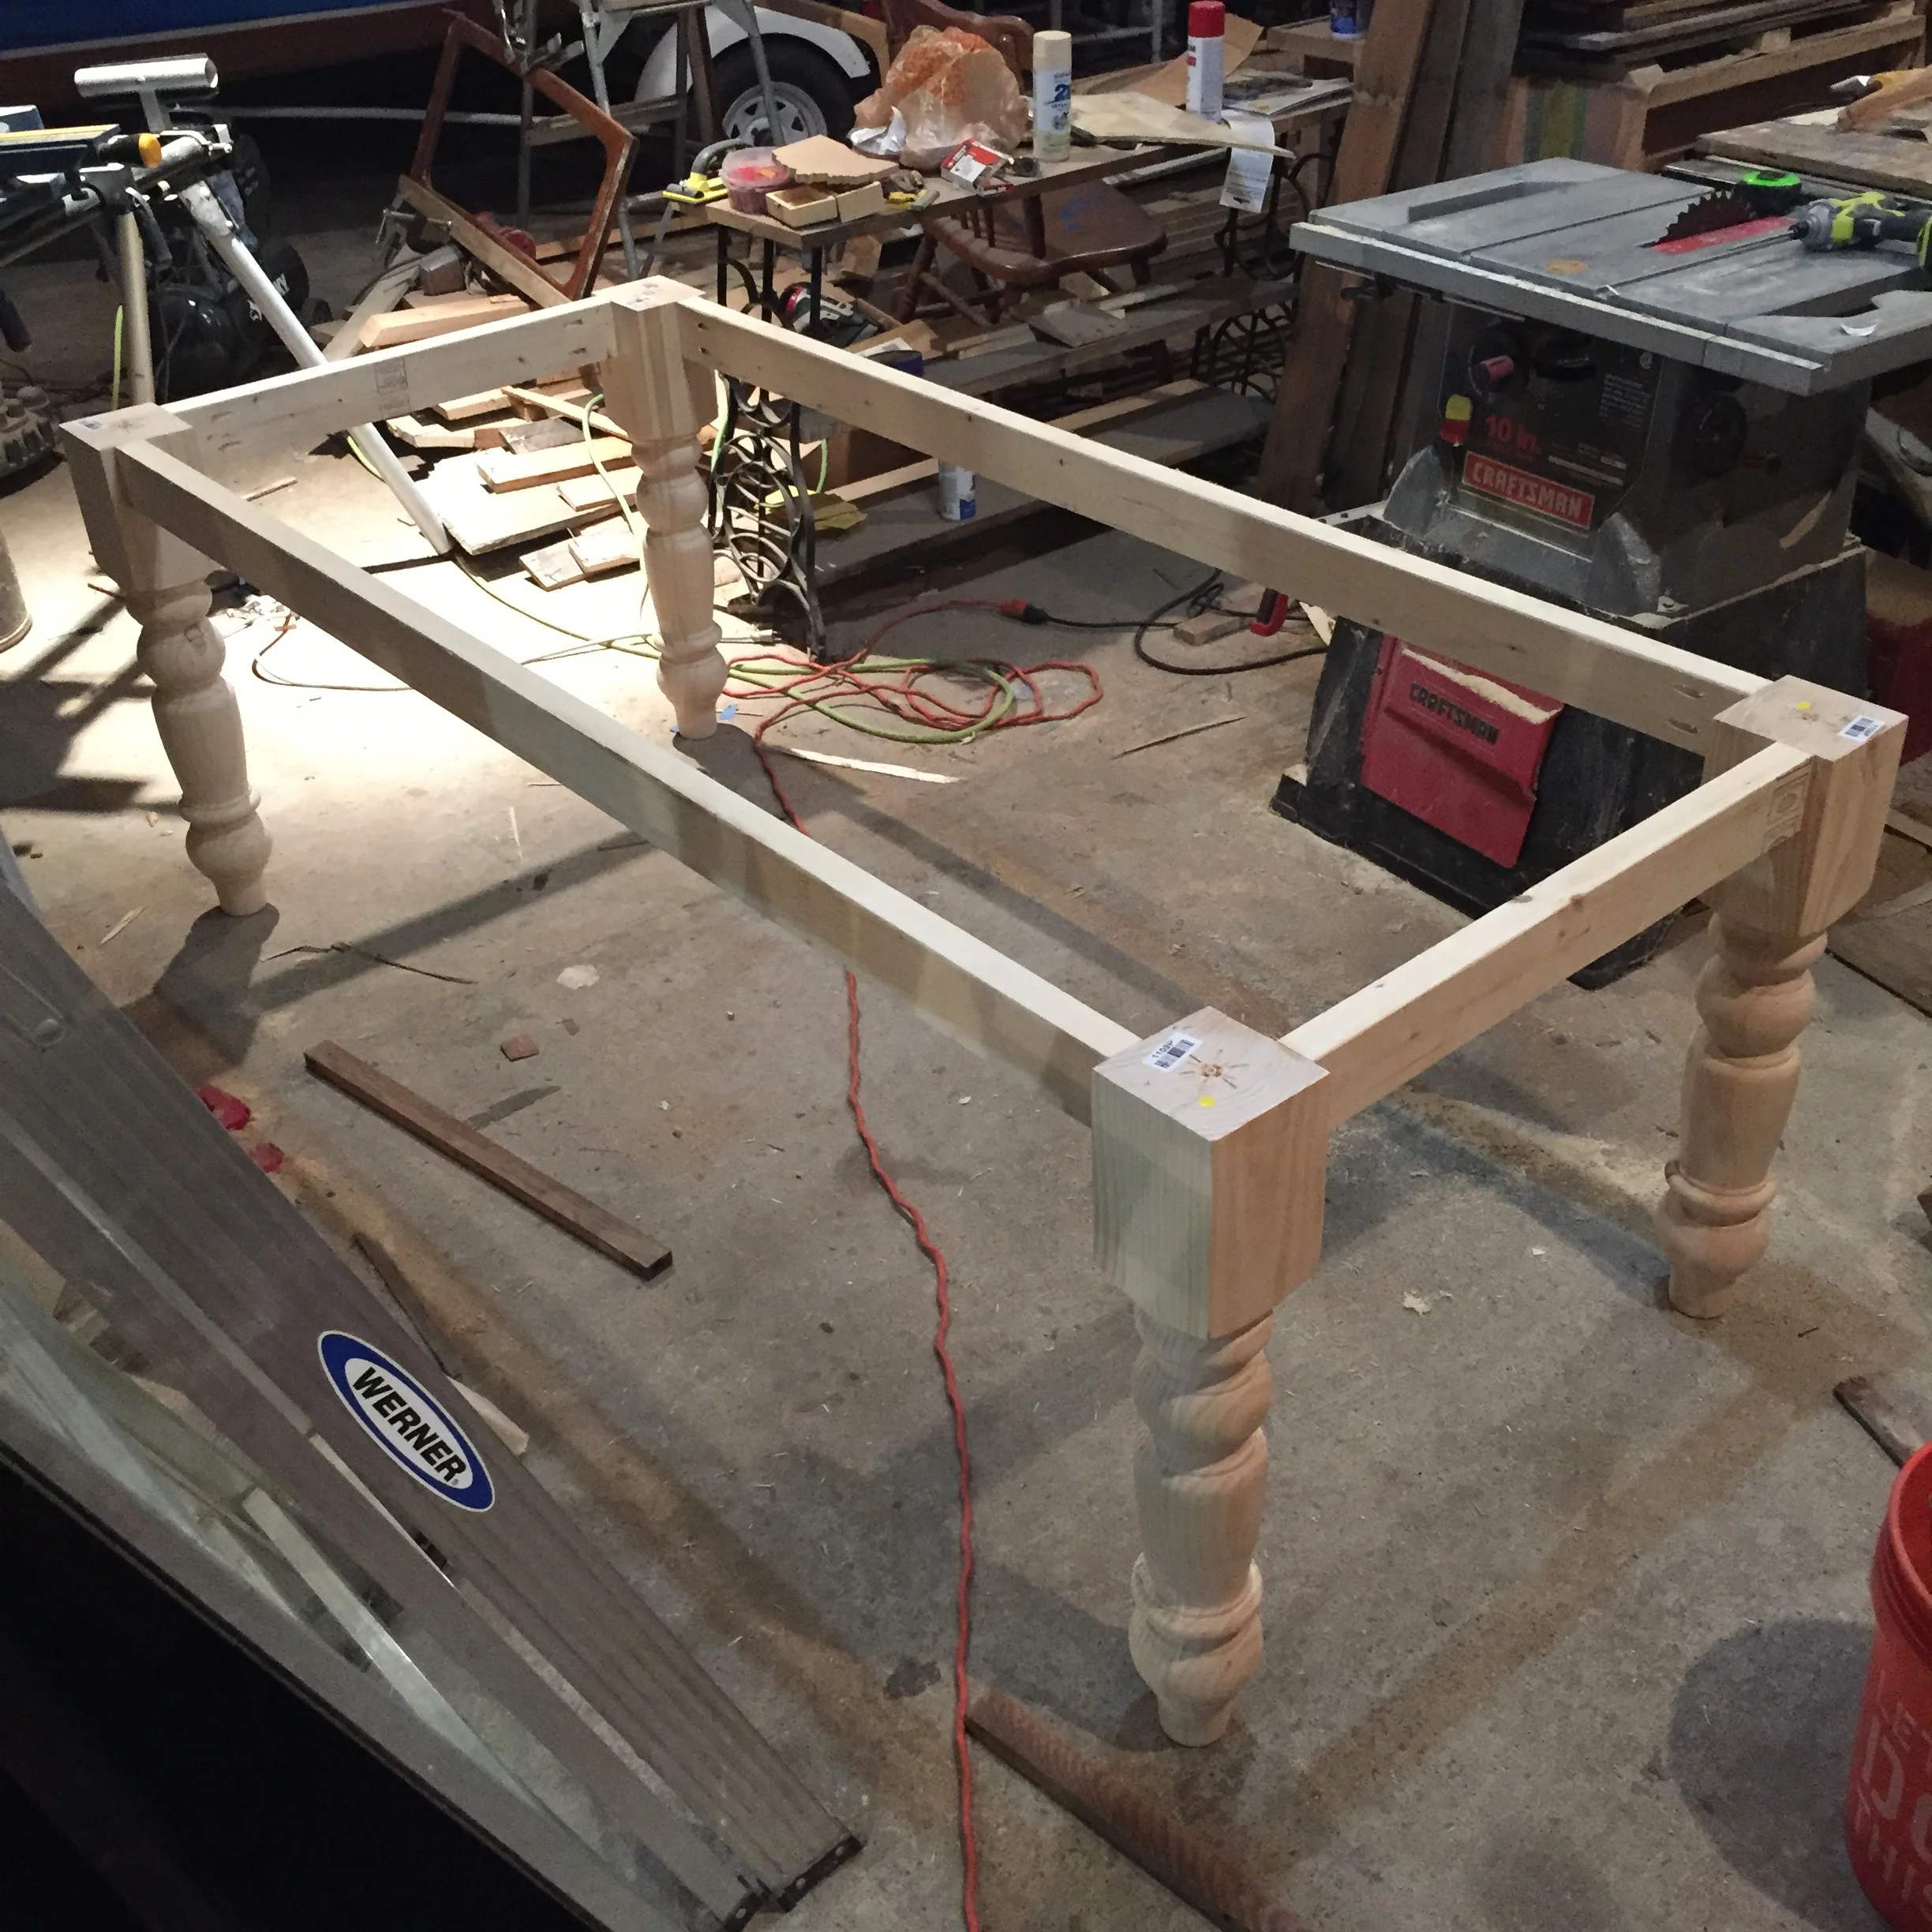
The table frame in a messy wood shop!
Next, I added more structure and a decorative piece of wood to the base. The decorative piece on the bottom of the frame is a 1x2 piece of pine. I left a small ledge for some added style.
The extra structure is to provide more strength and add more surface to attache the top too. The cross pieces where attached with more pocket holes, and then the end pieces were also screwed into the legs with 3" screws. This was to reall lock in the legs and make it so they wouldn't rock or move.
Farmhouse Table Frame with added support.
Now that the table base is complete,it was time to start on the solid hickory tabletop. The Hickory we used has a special meaning, because it was harvested from the trees that were from my childhood home. It will now forever be a piece in my dining room where family meals and those family conversations happen around.
The hickory we have was rough cut on a band saw mill and then kiln dried. Before we could turn it into the table top, we had to run the wood through the planner and joiner. The planner gets the wood to the same thickness, and the joiner gets a flat edge on the side to join the pieces together uniformly.

Wood after passing through the planner and joiner.
Now that the wood was smooth and square, we used a biscuit cutter to join the top together. We used 8 biscuits in each joint to ensure a tight fit. Then we glued the boards together, 2 boards at a time. This was to minimize the boards from cupping and moving under pressure. We did 2 boards, 2 other boards, and then the 2 glued sections to another board, for one solid top.
When joining wood, I am a believer in gluing the wood up whith longer boards than you need, and then trimming everything to size. This ensures your finished piece will be square (if you cut it square).
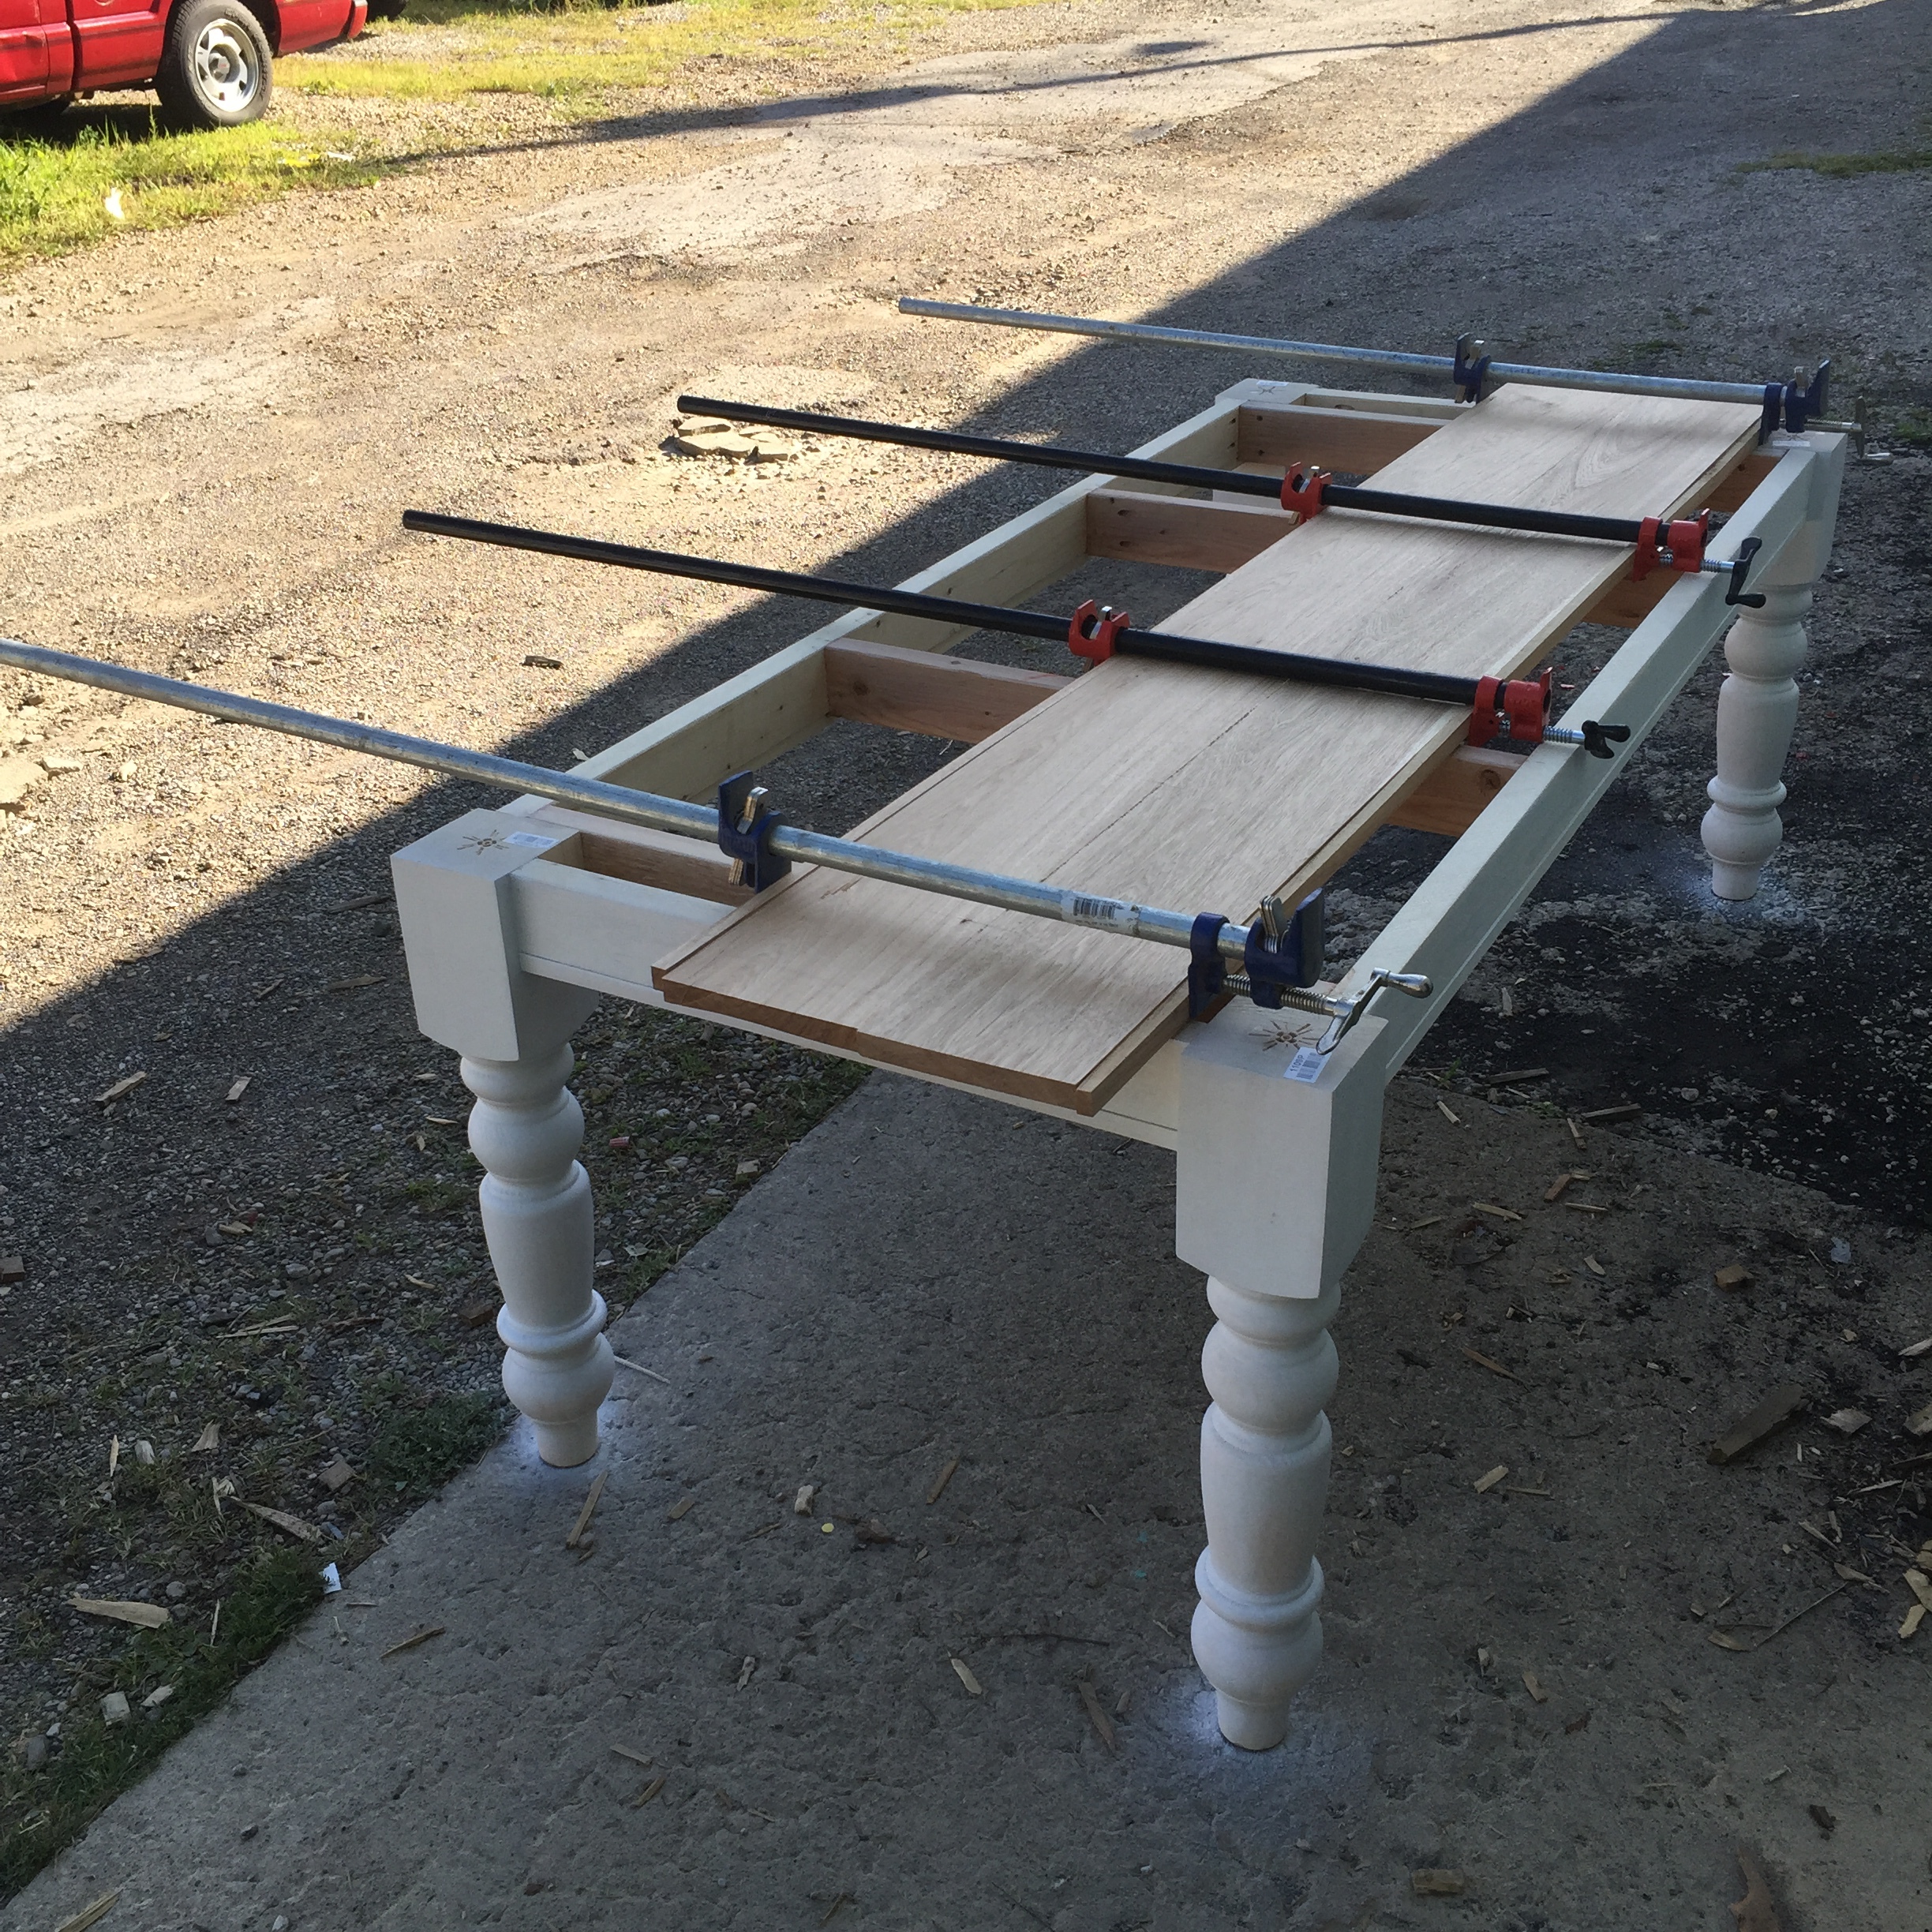


Test Fit the top before the final glue-up.

The Tabletop after getting cut to size and sanded.
Next was the long progress of sanding everything smooth and preparing for paint and varnish. On the table top, we had to sand away the glue residue, and sand the seams smooth, anywhere they weren't level. We also rolled all the corners by hand sanding the edges lightly, to prevent the sharp edge from scratching people when moving around the table.
The table base was spray painted to prevent brush marks and apply an nice coat. We used a satin white for an aged farmhouse style look.
The table top was varnished with a clear satin varnish, and we applied 3 coats for good coverage and protection in the event of spills. I like to use the roll and tip method for varnish because it applies a nice even coat that lays flat.

Roll and Tip Varnish

Farmhouse Table Top after varnish was freshly applied.
To assemble the finished table, pocket holes were drilled around the inside of the frame and on the cross braces. We used about 18 screws to ensure a nice tight fit evenly around the top. Also, the top was not glued to the base. This is important for moving the table and being able to easily disassemble in the future.
With the addition of some chairs, the table was ready to use and enjoy for many meals ahead!
Farmhouse Table with Hickory Top and White Base


Follow us on Instagram