
How To Build A Triangle Coffee Table with Hairpin Legs
Adam Koons
Affiliate Disclosure: Thank you supporting us by visiting our site and posts. This website contains affiliate links that are ads recommended to you, that we can earn a small payout on. We only use Amazon Associates and Google Adsense. By clicking on these ads, making a purchase, or taking other action, we can earn a little extra money to fund future projects.
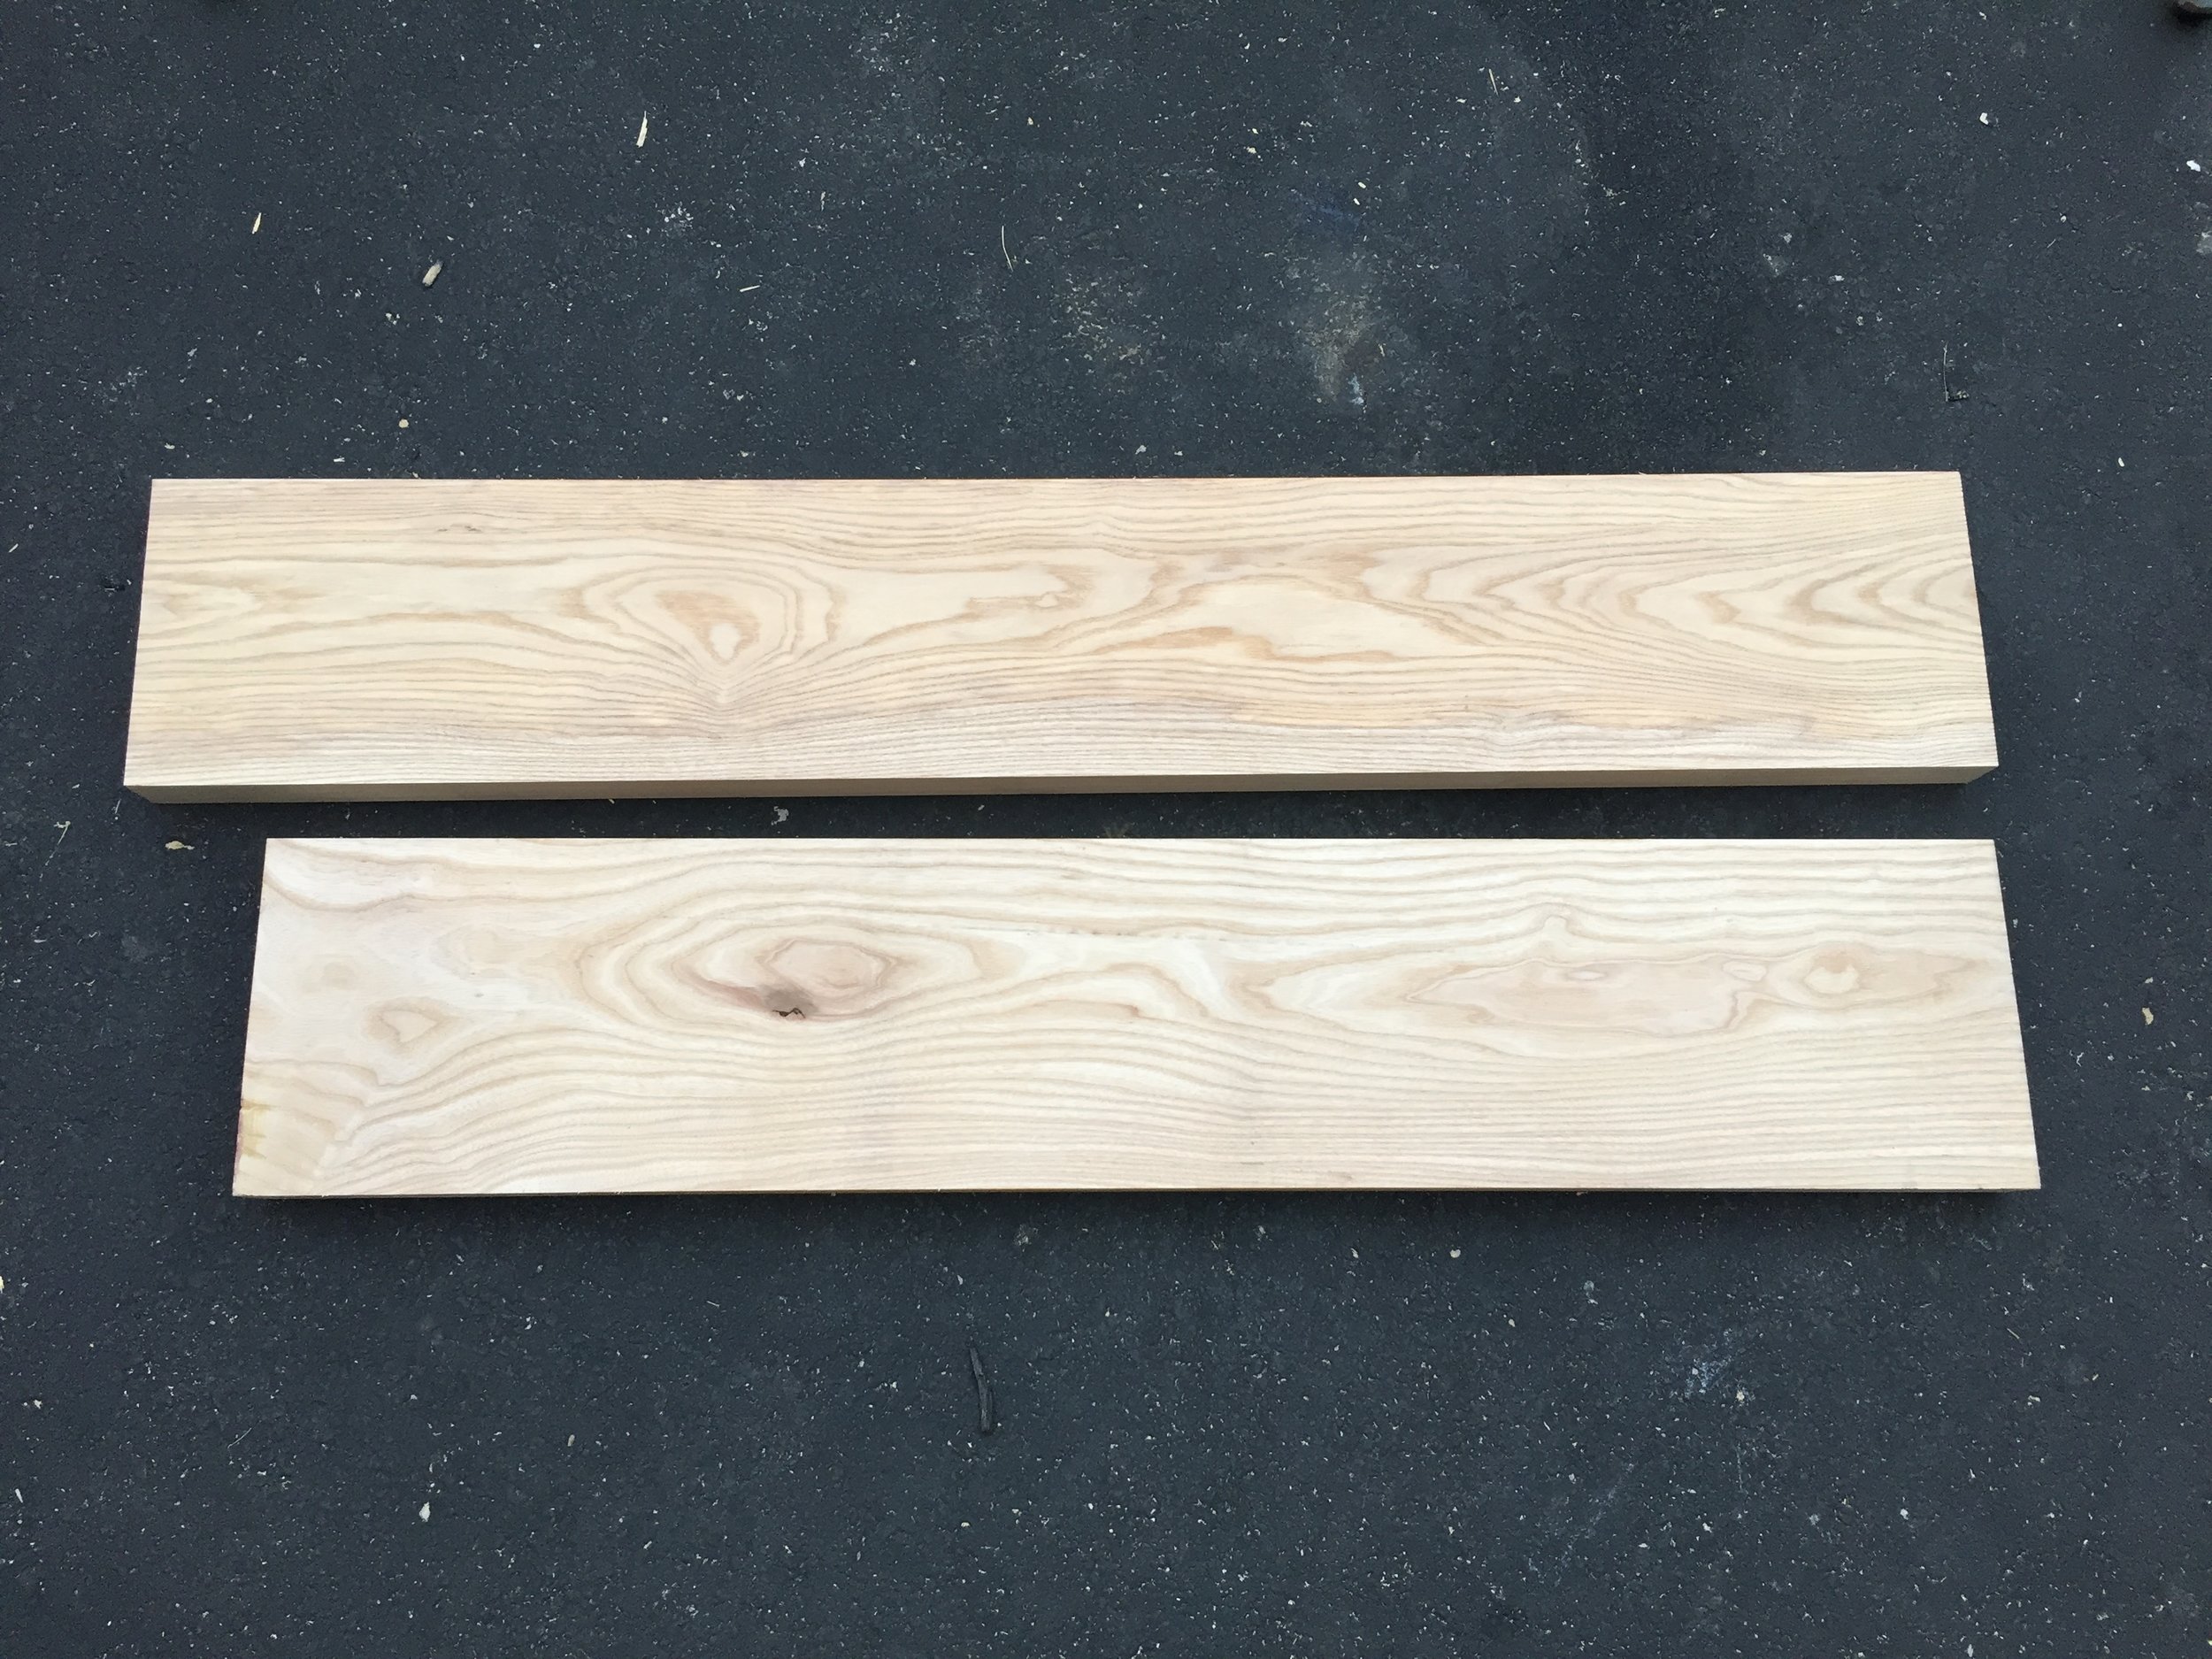
The scrap lumber seems to build up in my wood shop, and I can't seem to let lumber scraps go after working on client projects. About two years ago I built an outdoor drink ledge at a brewery with 2" thick Ash lumber, which matched their table tops and benches. Since then, I have had 2 left over planks that are around 3' long, 2" thick and 9" wide. Way too nice to just throw away, but what to do with it?
Then, while cleaning out the cabinet in my workshop I cam across 3 hairpin legs. Why would there only be 3? Who knows, but that's all there is. They are coffee table height, and a little rusty since they weren't sealed.
So what do you do with 3 legs and 2 planks? Why not make a triangle Coffee table! I haven't seem many triangle tables (there is probably a reason) and I'm not into the mid-century modern styles. However, since I have all the materials, tools and skills, let's try to make a unique coffee table by blending the beefy wood from farmhouse style, modern hairpin legs, and style/shape from mid-century modern design.
How to Build the Coffee Table Top
Step one would be to run the planks through a planner and joiner. However that was already done when I made the counter top. You will want the planks to be the same thickness and to have a stright edge to joint the pieces together without a gap.
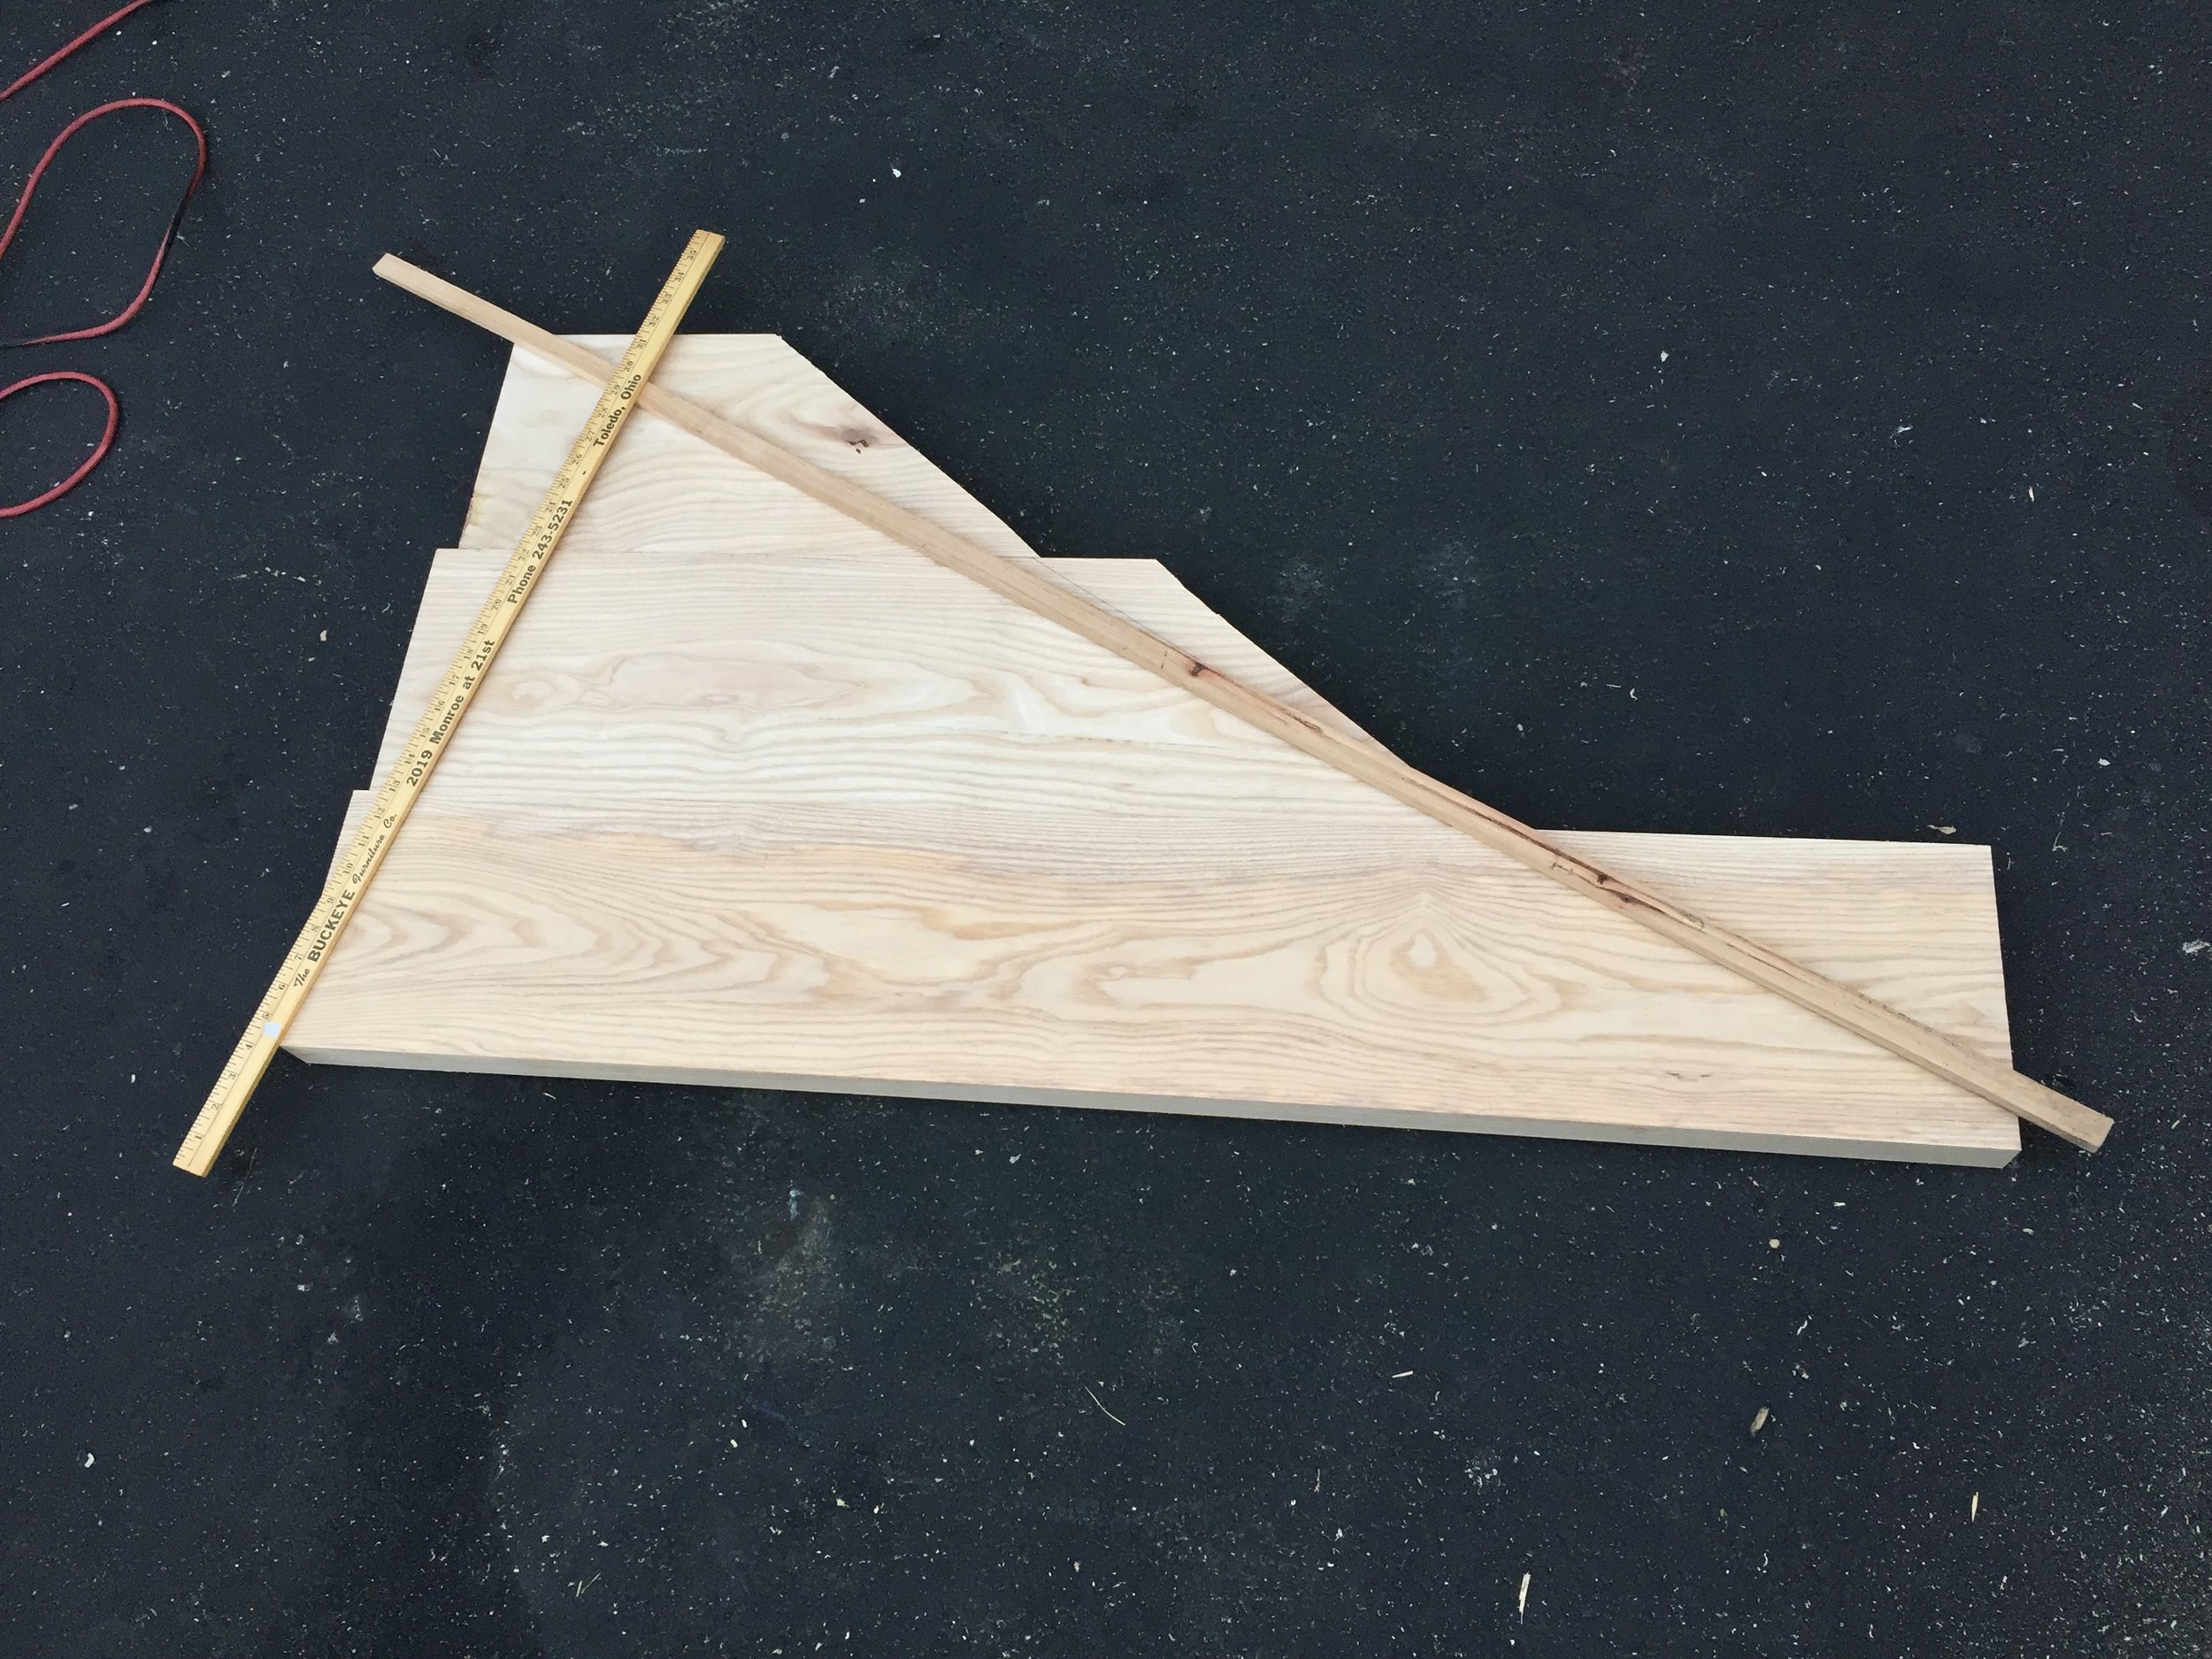
Next, I laid out my shape by using a scrap stick of wood and a yardstick. Since I am not following any plans, I wanted to get a rough idea of size and shape to make the most of the material I have available. I won't be buying any lumber, so I have one shot at it.
Side note: I believe adapting to lumber when working on a project is a skill that is missing in the plans on the internet. When building furniture, be able to adapt your plans/designs to the natural character and dimensions of the wood. Don't be afraid to adjust the size of the furniture to illuminate waste and build with what you have available.

When I was happy with the overall shape, I marked a line on the plank that needed to be cut and cut it on the sharpest angle I could cut on my Miter Saw. The biggest challenge was determining the rough shape, within the 9" additional inches I could add via the cut off.
Now that the pieces were laid out, it was time to glue them together. I am a huge fan of biscuit joints. They are easy to make, they keep everything lined up, and they do add some strength to the joint.
First mark the locations of the center of the biscuit on each plank. Then using a biscuit cutter, cut the slots at all the marks. Be careful to make sure the biscuit won't hit an edge when making the final shape cut.


After a quick dry fit to ensure the planks would line up, apply glue to all the areas between the planks and in the biscuit grooves. Once the glue is spread, use bar clamps to squeeze everything together for a tight fit.

After the glue has dried, remove the clamps and prepare to cut the triangle shape. I laid the shape out using a yard stick and wooden cutoff to make the most of my material. I didn't worry about angles and geometry, but relied on the eye test and getting the larges size I could.
To cut the triangle, I clamped a straight edge onto the table top, and followed it with my circular saw. I did this for both cuts, and left the long straight edge as the third size.


Next I applied a satin Varnish I had left over from the staircase makeover on my basement renovation. I applied 3 coats to give a thick coat, and to make sure I had full coverage everywhere.

While my varnish was drying, I sprayed the hairpin legs with a satin clear coat. This is to seal up the surface rust, and prevent further rust from forming. Finally, I screwed the hairpin legs on and the table was complete.
The table tuned out to measure 49" long x 28" wide x 15" tall. Not a bad table for using primarily scraps and left overs in my workshop. Good thing I saved all this stuff!