Staircase Remodel - DIY Basement Stair Transformation
Adam Koons
Affiliate Disclosure: Thank you supporting us by visiting our site and posts. This website contains affiliate links that are ads recommended to you, that we can earn a small payout on. We only use Amazon Associates and Google Adsense. By clicking on these ads, making a purchase, or taking other action, we can earn a little extra money to fund future projects.
We have been in the process of finishing our basement to make a playroom, and take back the living room from all the toys and baby things! Putting up walls and adding doors was easy, but I wanted to stairs to make a statement in the new basement, without breaking the budget.
This is our DIY Stairs makeover!
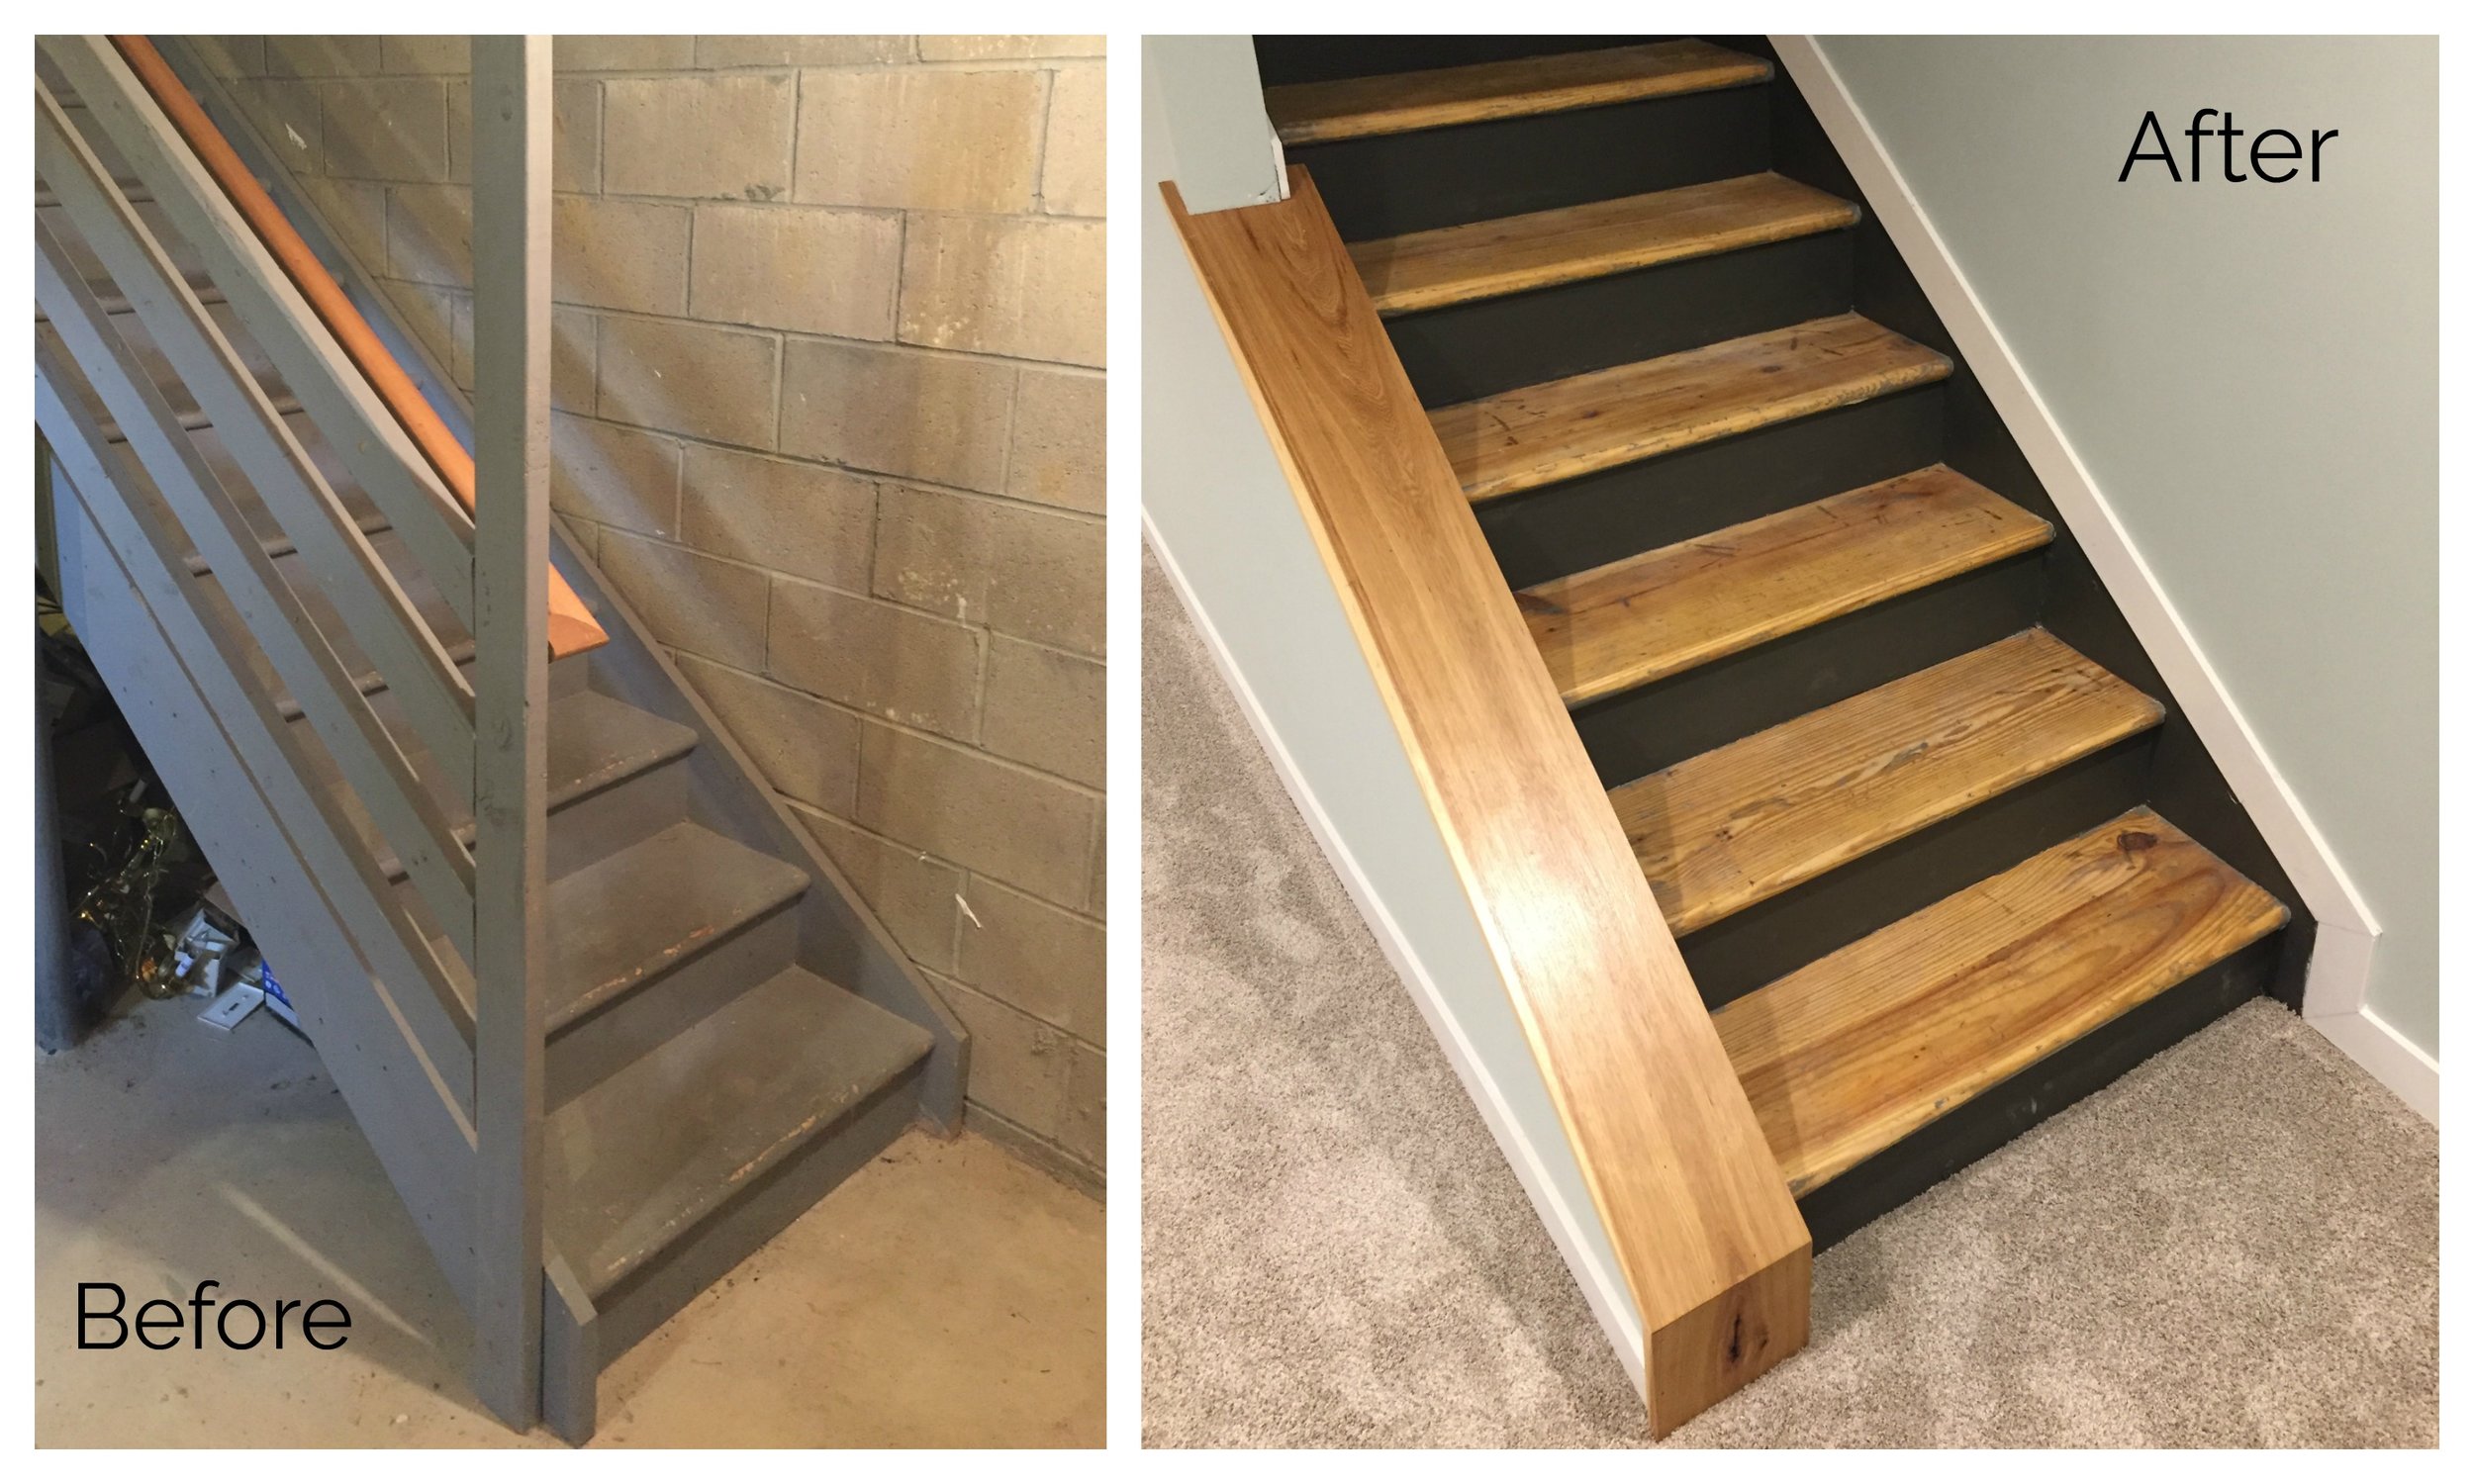
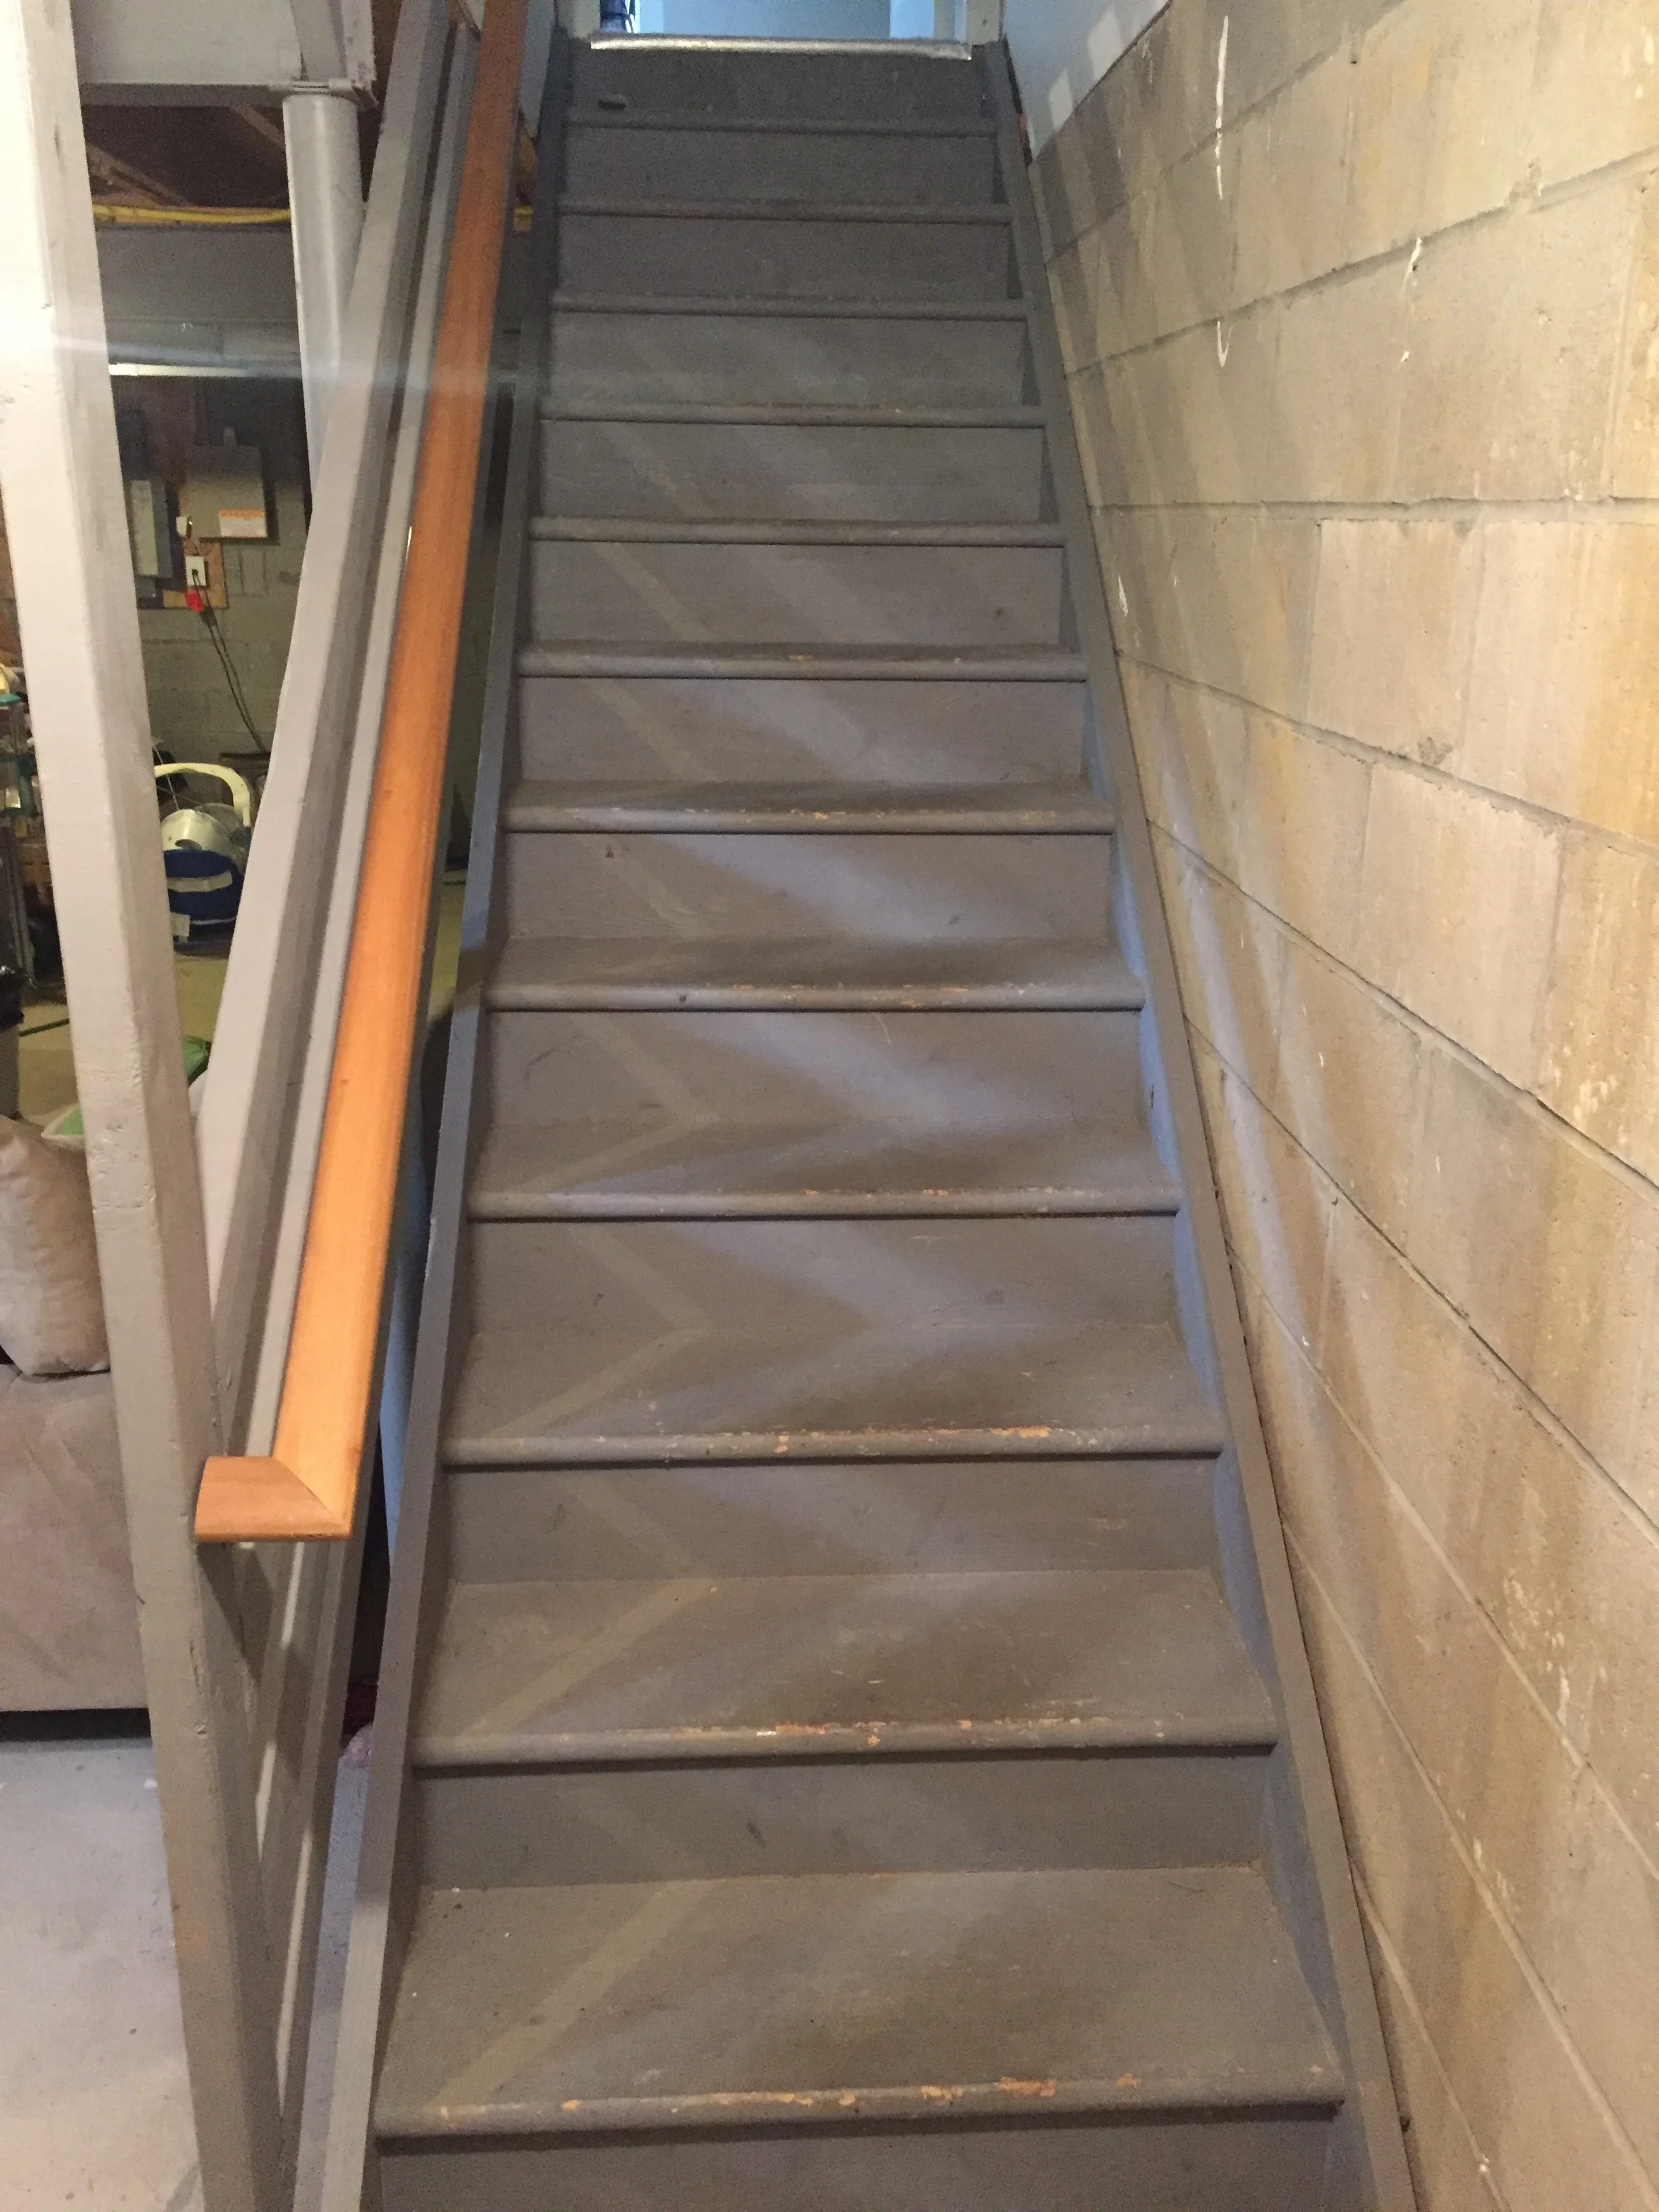
The Before
Our basement stairs were painted "battleship gray" and were abused and beaten. The previous home owner had pets and there were plenty of signs from claw marks, along with the general wear and tear of carrying stuff up and down the staircase.

We took to Pinterest for our stair makeover ideas. There was tons of inspiration out there, but I didn't find the exact look that I wanted. However the ideas gave me a plan; sand the treads to be mainly natural, and paint the risers and stringers to accent the room.
Stair Makeover Step 1: Remove the Banister and Demo
Our demo was fairly easy! We first started by removing the handrail, but unscrewing it from the wall, to preserve it to possibly use again. Next, we remove the 2x4 "railing" that was basically the builder grade banister for safety. Removing this made the space and stairs appear so much bigger and was an instant improvement!
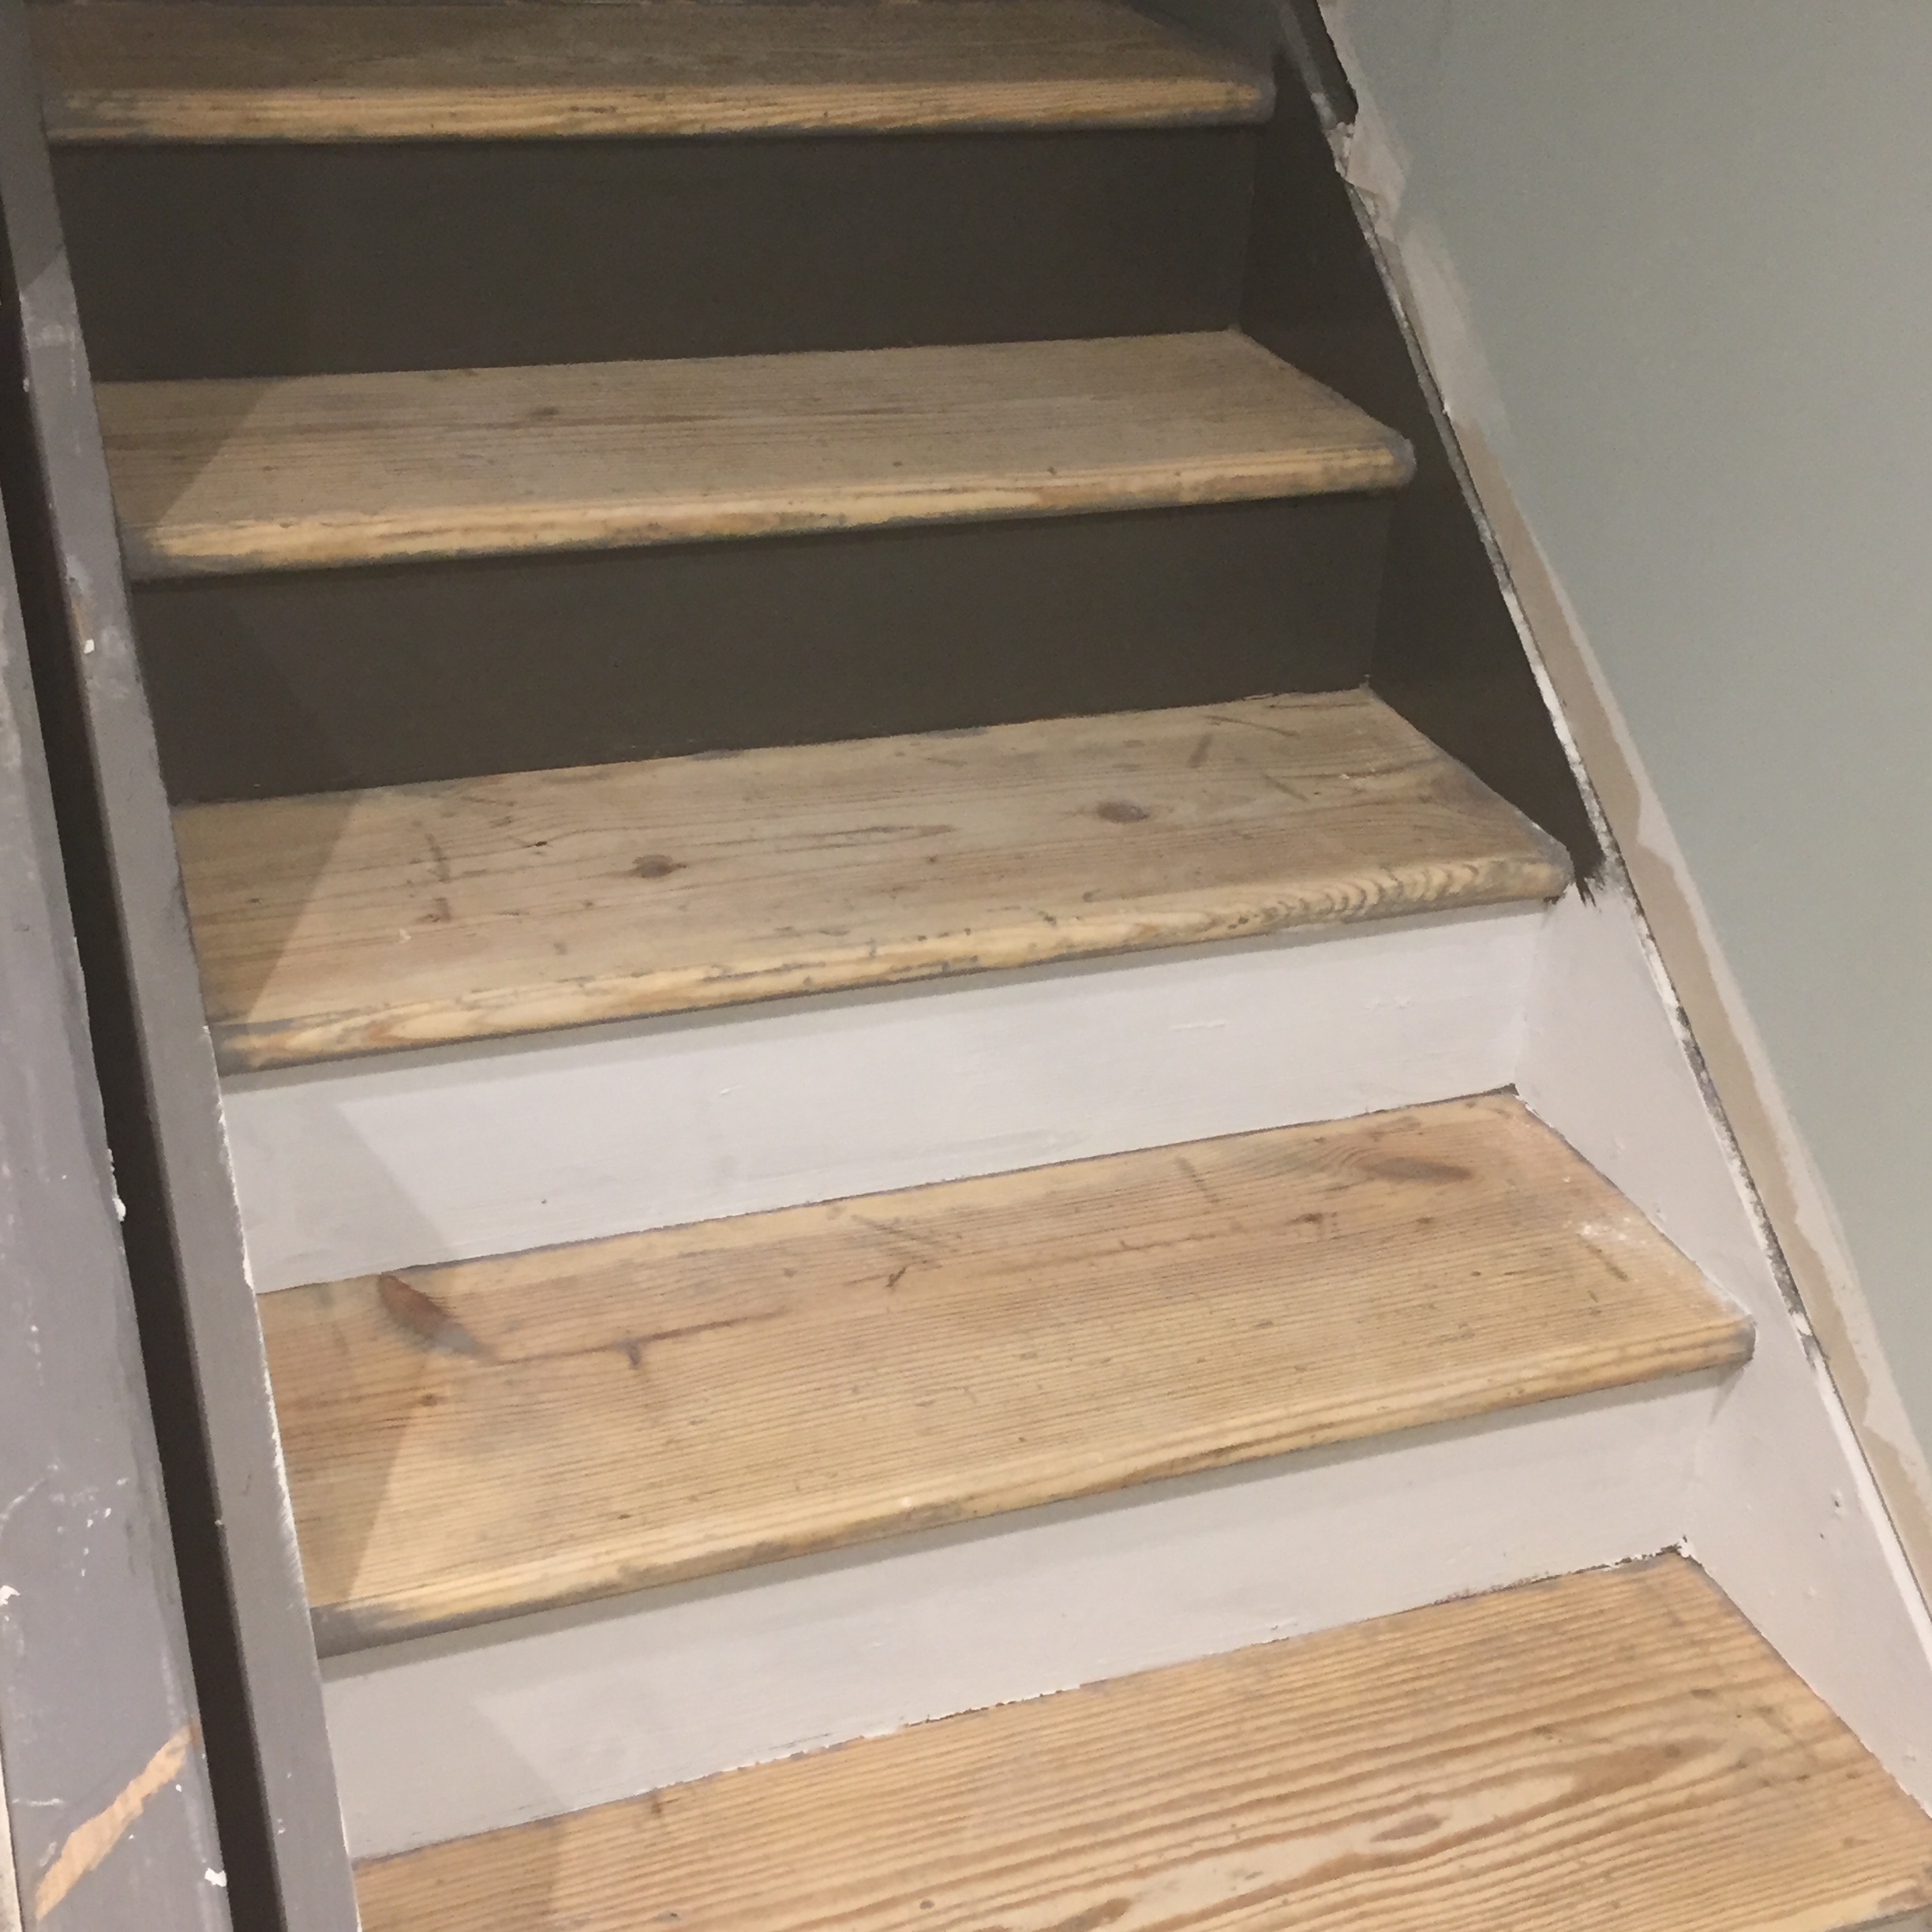
Stair Makeover Step 2: Sand the Stair Treads
This step is dirty, dusty, and sanding isn't a pleasant task! Since our treads were painted I used 80 grit sand paper on my random orbital sander, and removed as much of the paint on the treads that I could. However, during the sanding, I thought that the gray paint in some of the gouges looked neat, and I left some of the paint for a "worn farmhouse style" appearance.
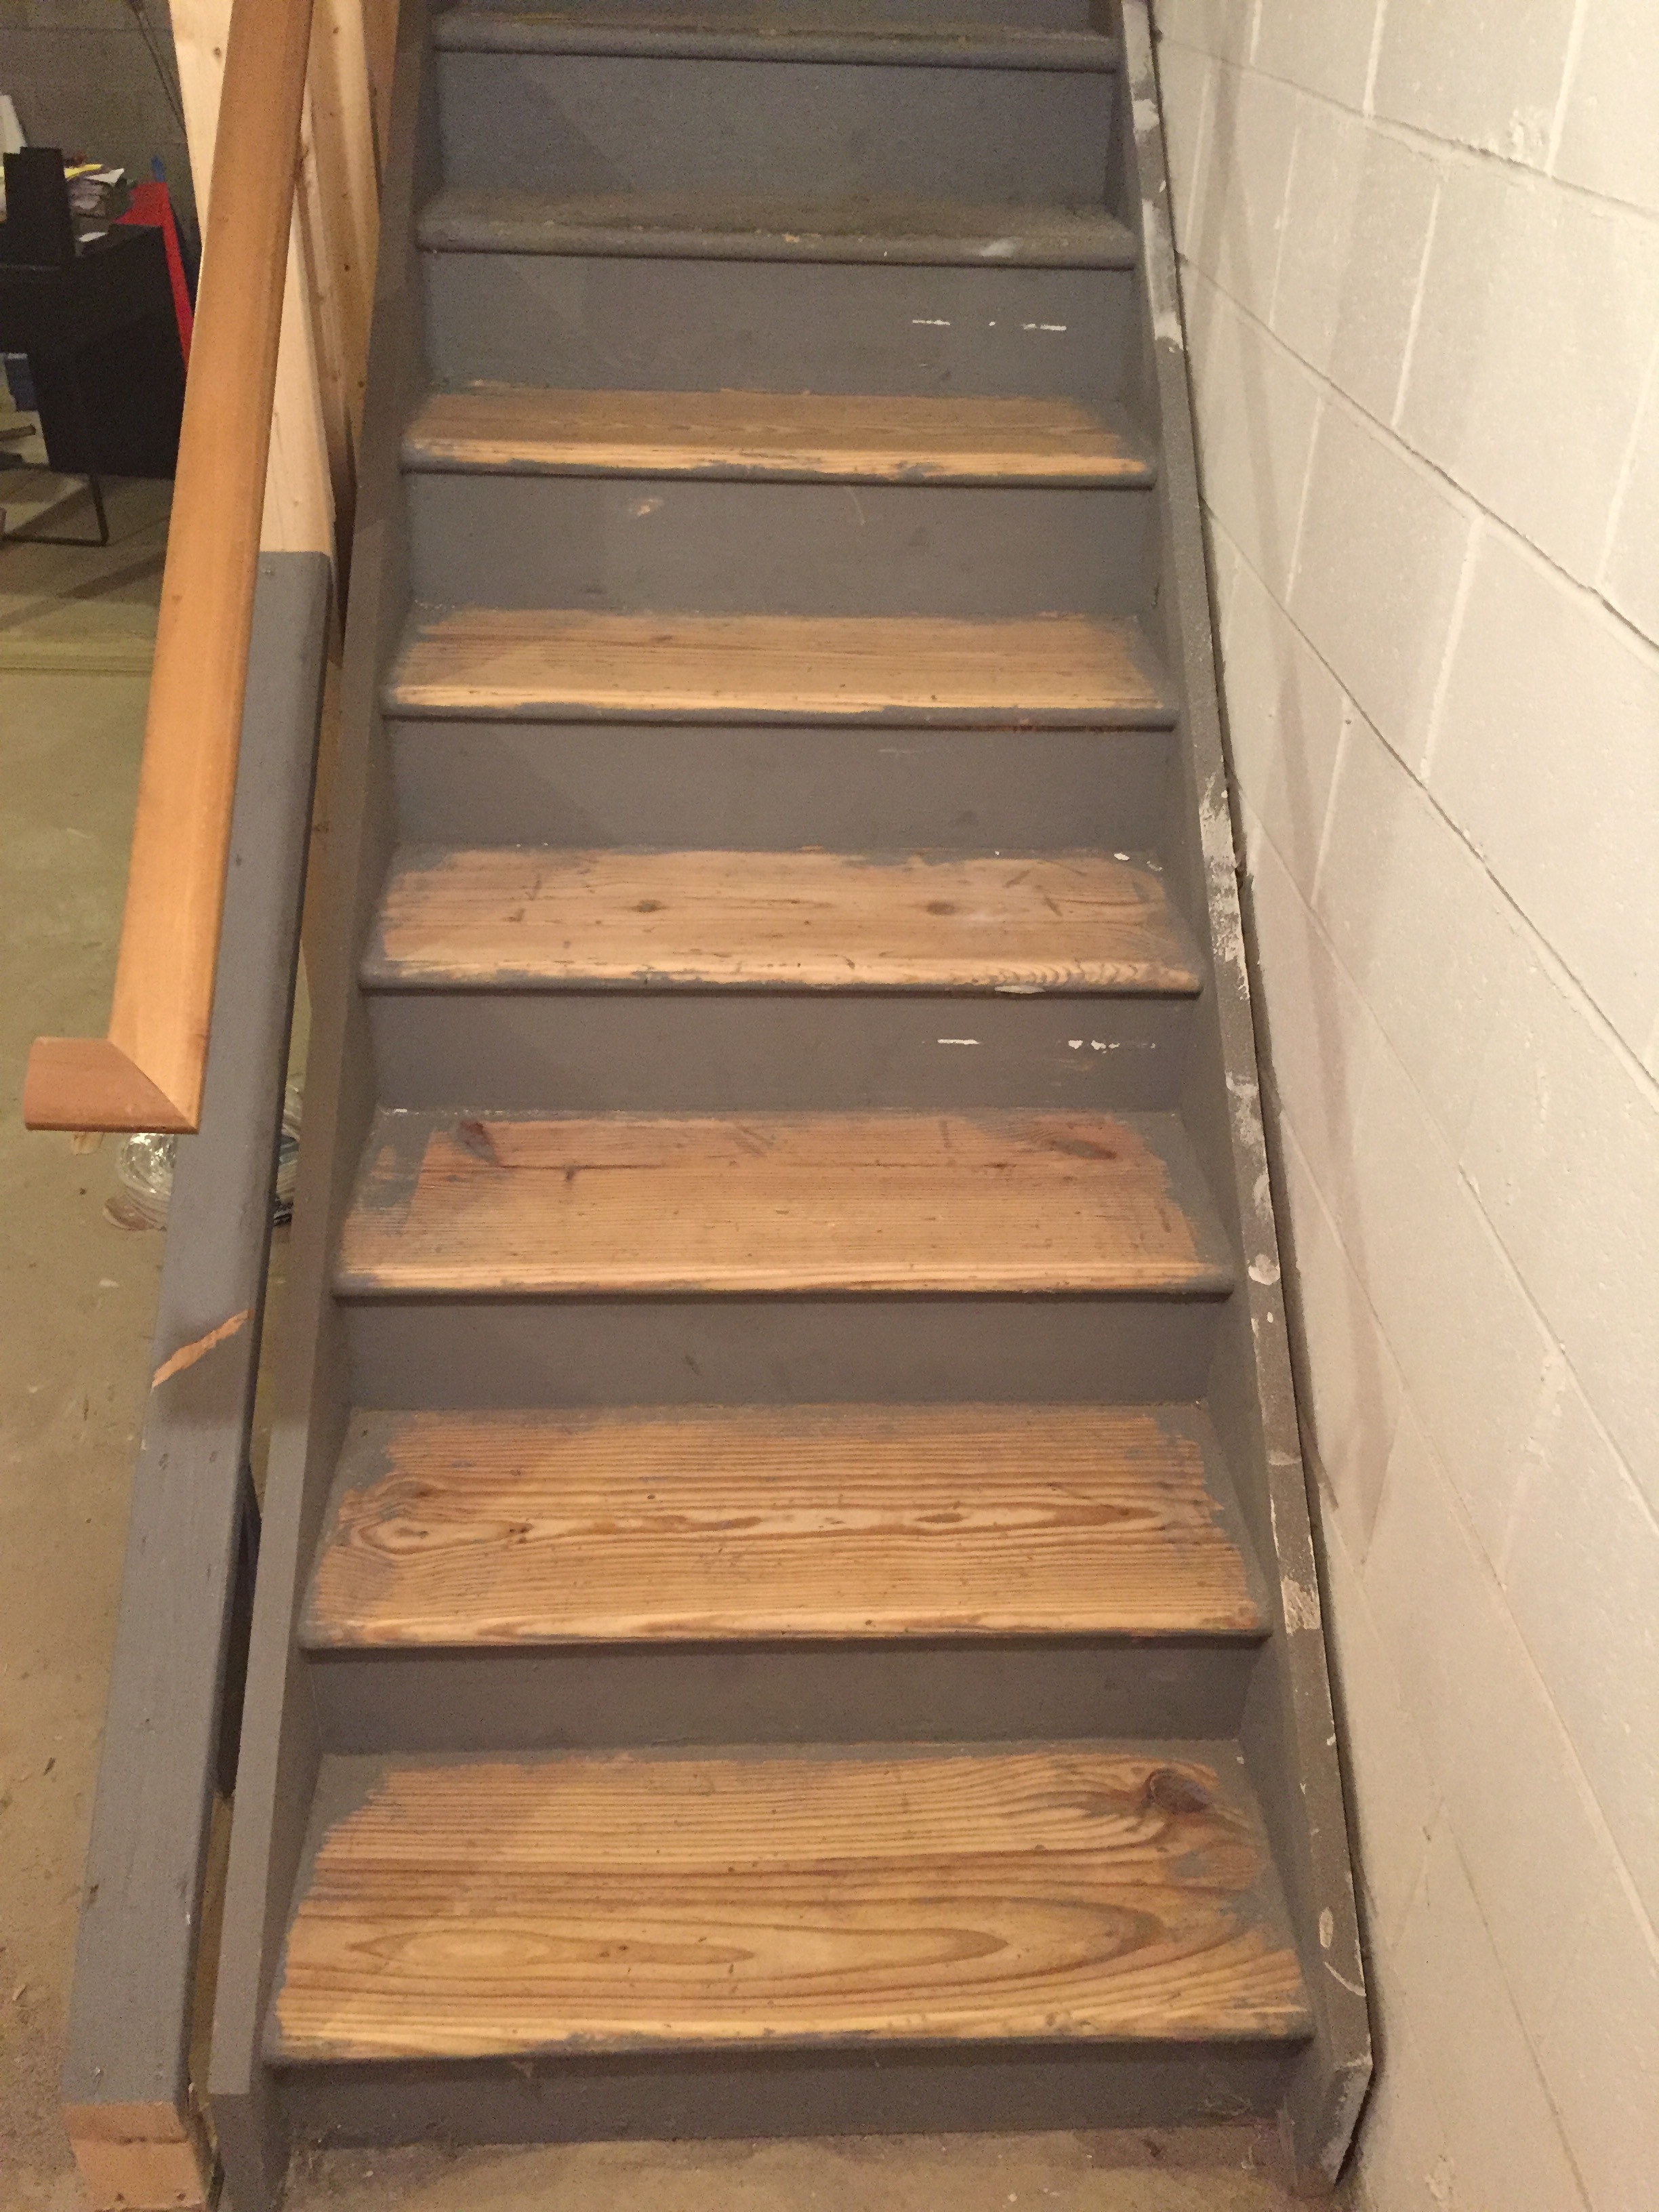
Since the sander is round, its impossible to get the corners with the sander, so after I had the majority of the paint off, I switched to an oscillating tool with a triangle sanding attachment. The small triangle allowed me to get into the corners and clean up the edges perfectly. '
Sanding is the worst part of this job. It seems like a never ending task, that you could bo forever to remove all the paint. Once you are happy with the appearance, sweep up and get rid of all that dust left behind.
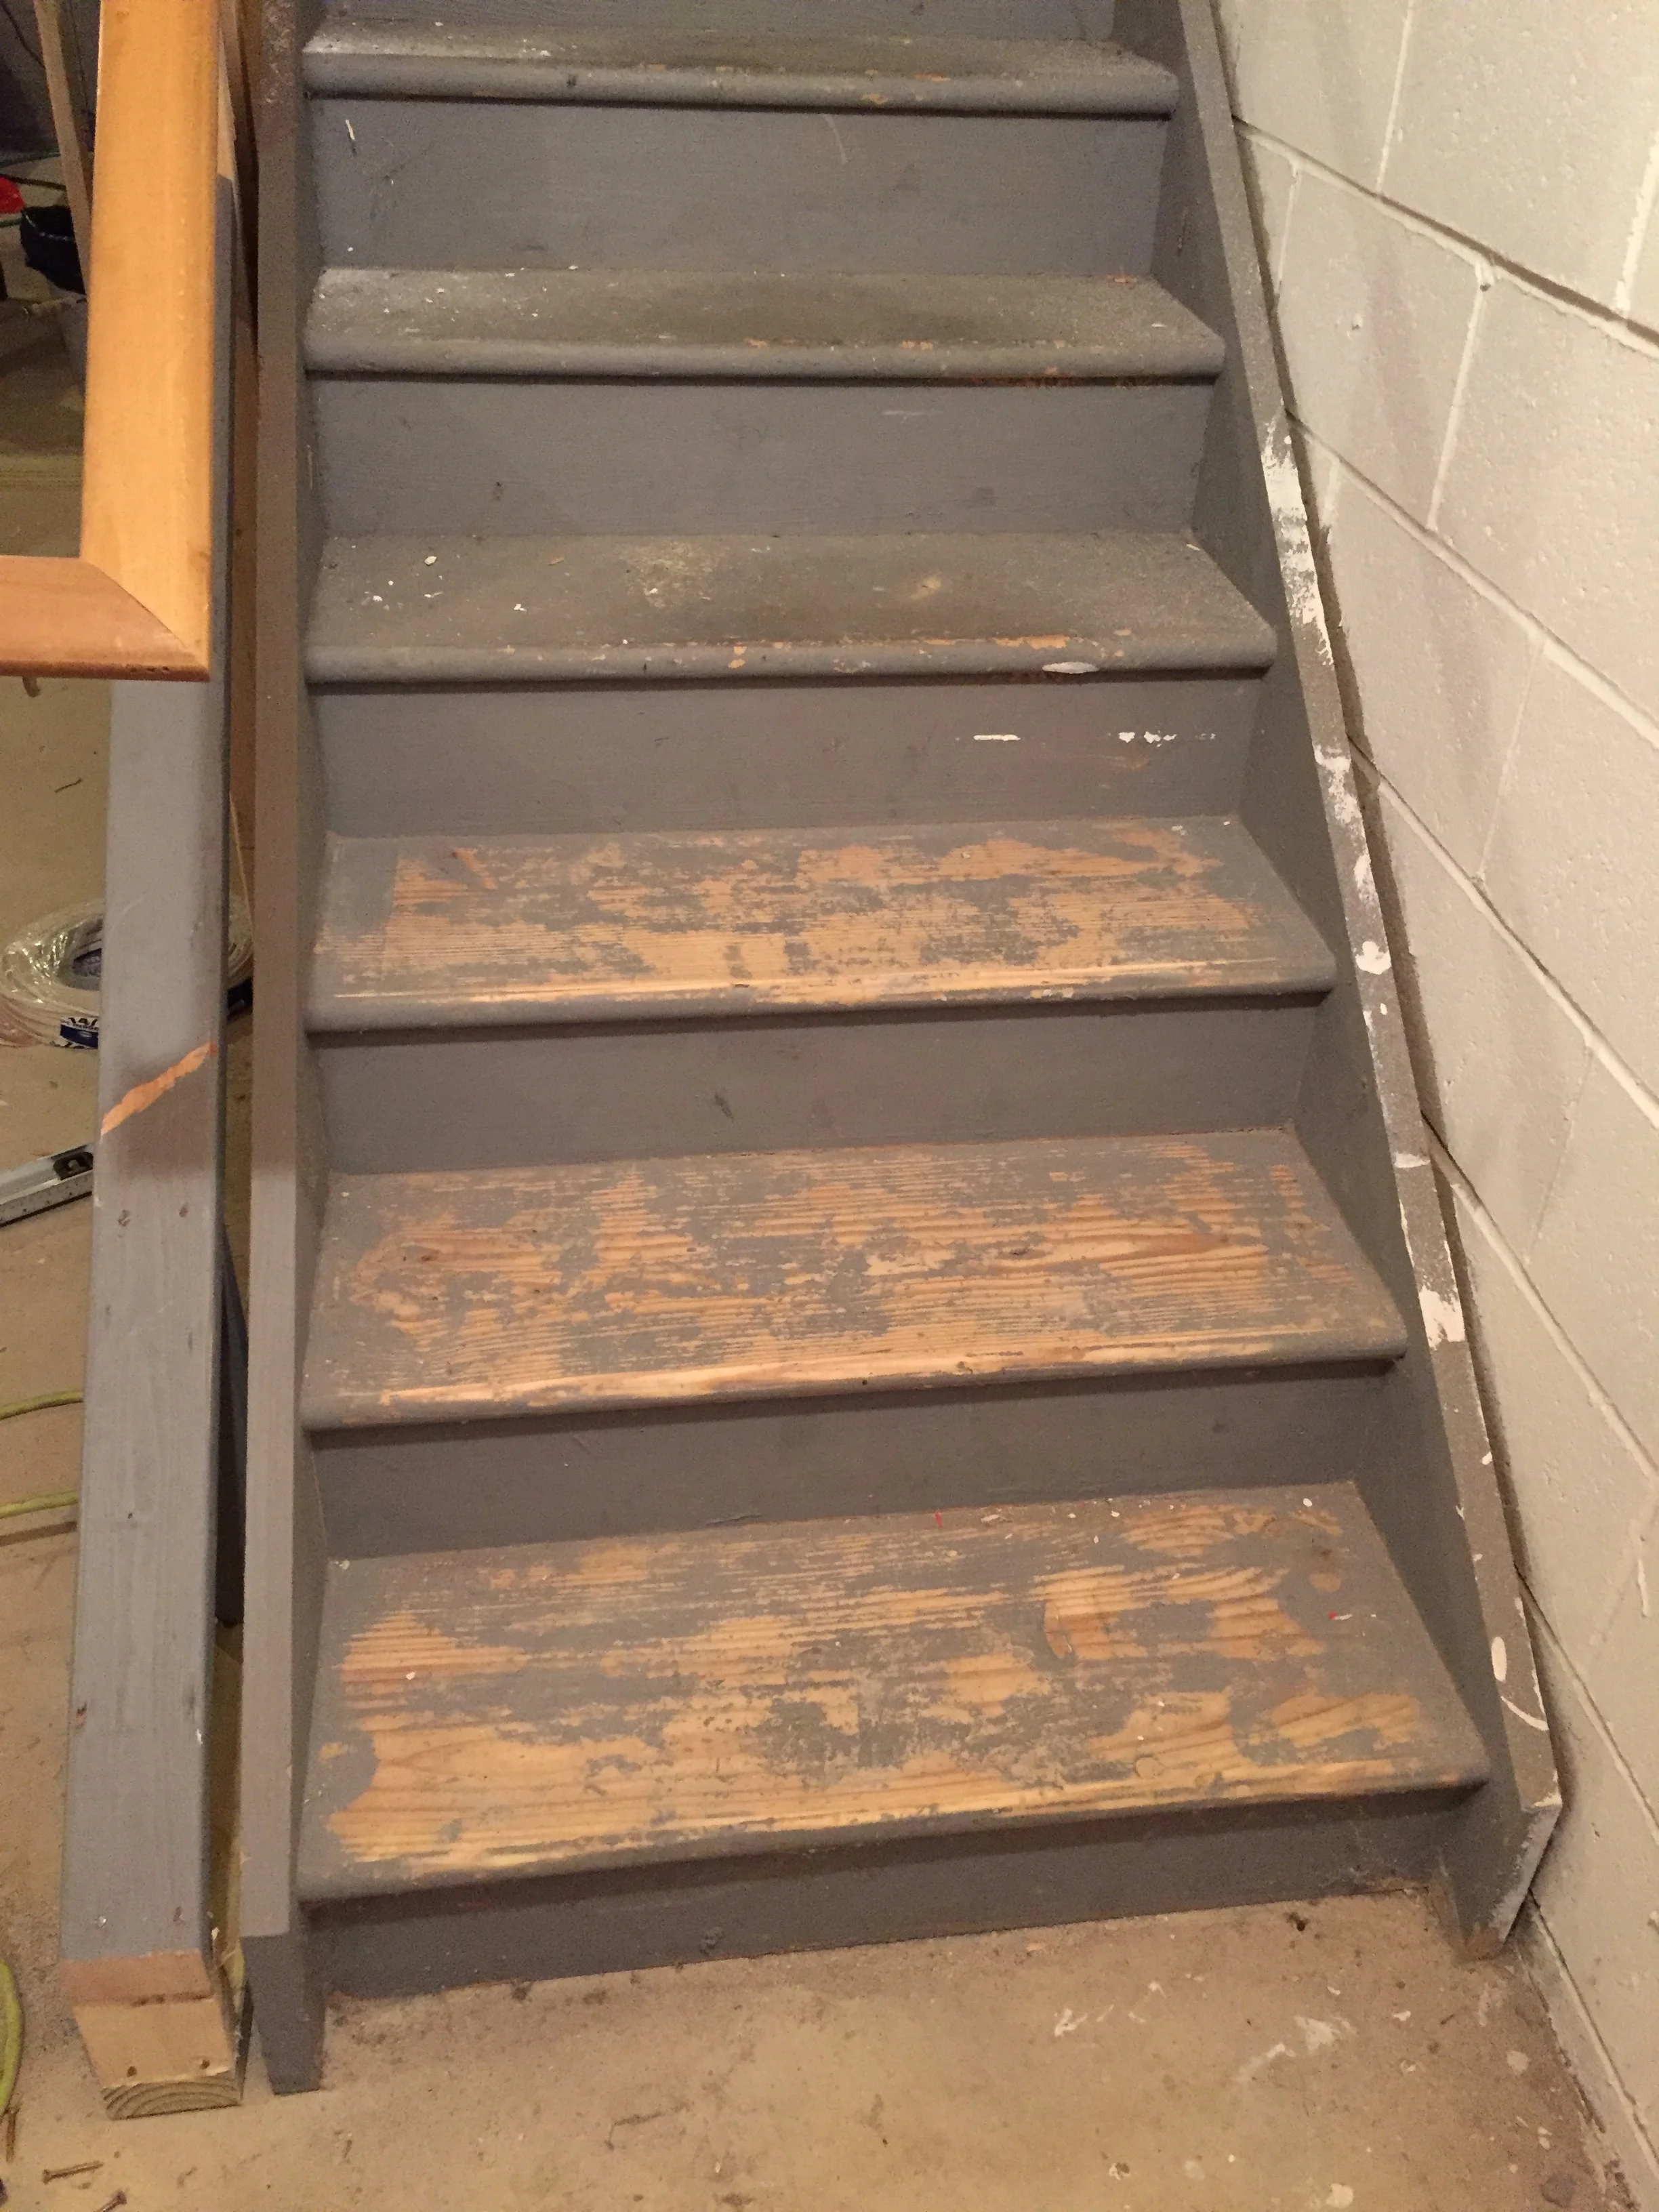
Starting to Sand the treads with 80 grit sand paper
More Sanding......
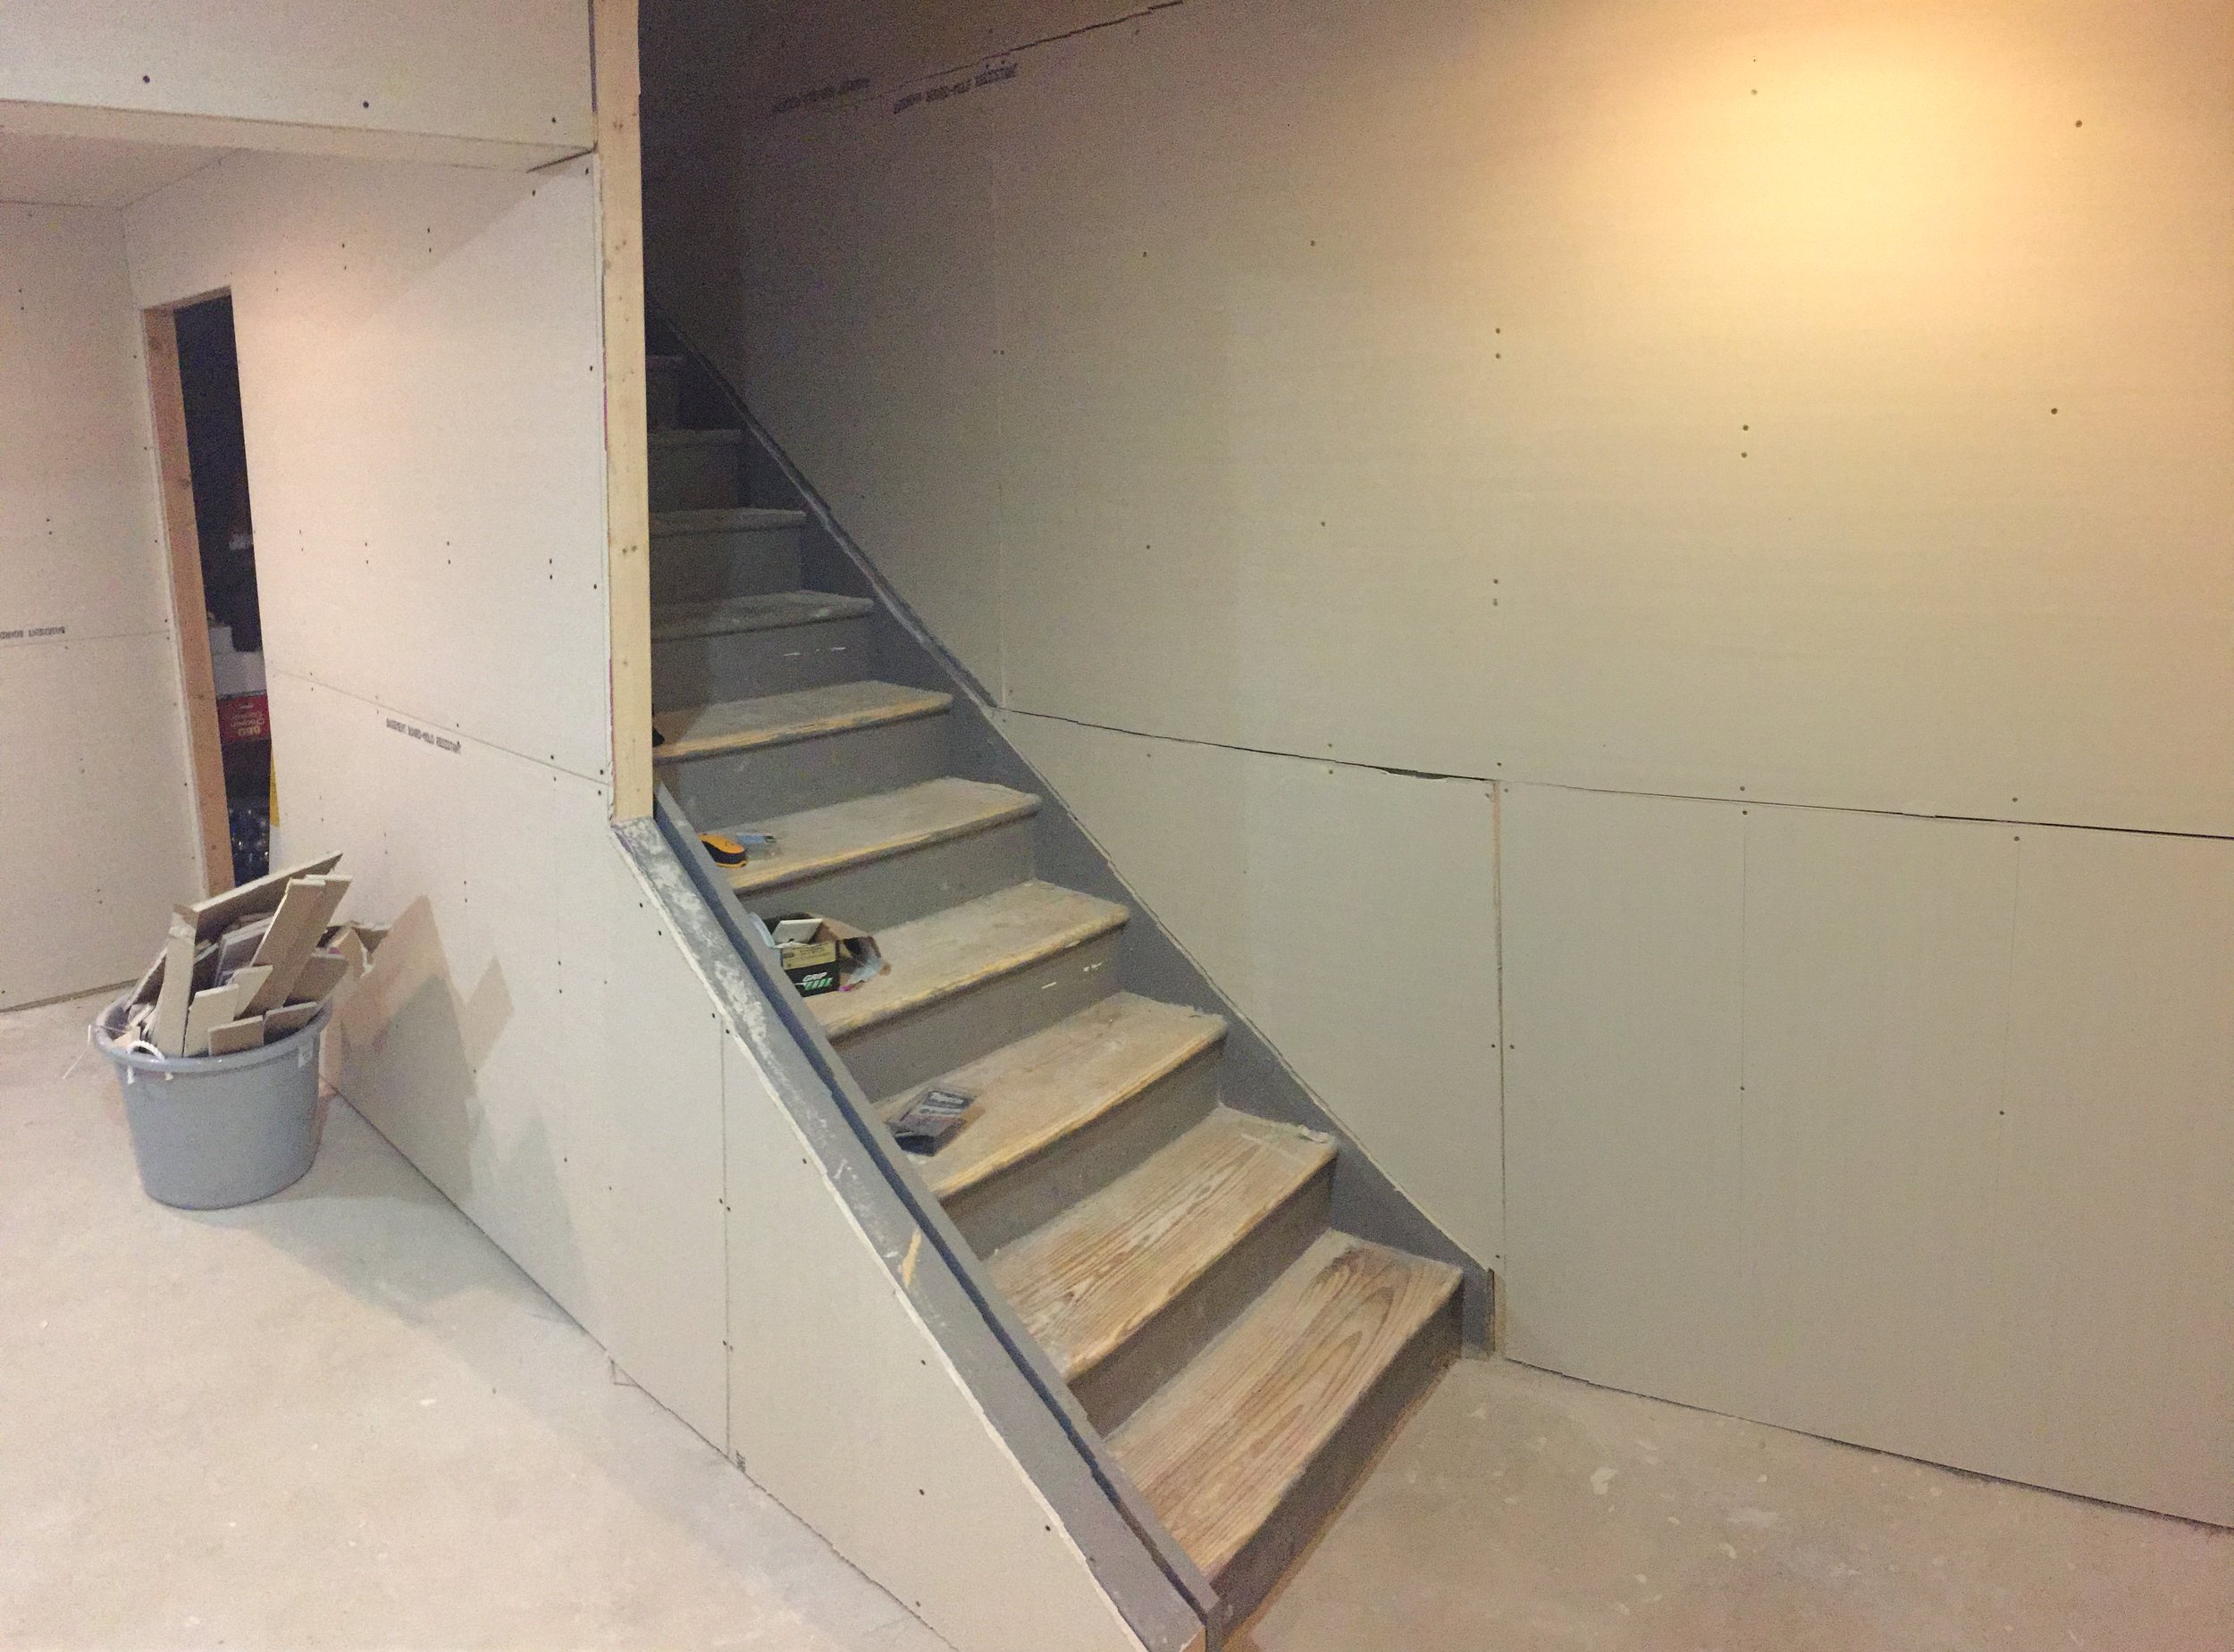
Sanded Stair Treads and New Drywall
Stair Makeover Step 3: Paint the Stair Risers and Stringers
We debated Painting the Stair Risers white or Urbane Bronze
Is it just me or is picking just the right paint color a fairly difficult task? I have such a hard time committing and I like to compare more options than probably necessary. Either way, we decided on Urbane Bronze by Sherwin Williams as our paint color. I love this color! I first saw it in a trendy downtown marketing agency, and felt that it is a modern industrial color that pairs well with natural wood tones.
We used the paint from one of their sample quarts to paint the stairs. It is probably frowned upon, but it has been great so far. The best part about using the sample paint is it only cost $7!
Stair Makeover Step 4: Wood work and Varnishing the Treads
I like natural wood. I believe that the natural variation and design of the wood grain looks timeless and clean. I added a board on the "knee wall" beside the stair as a cap on the wall. I used a piece of solid Hickory and cut my joint so that the wood grain would continue and appear that the wood was bent over.
Finally, I made sure all the wood on the staircase was clean and dust free, and I applied satin wood finish to the treads. I used a 3" brush and put on one medium thickness coat of varnish. I didn't want the treads to look brand new, or to get slippery, so I went with one coat (you should probably do more it your stair is in a high traffic area).

Natural Stair Treads with SW Urbane Bronze Risers
The After
I am extremely please with the stair case transformation! For less than $100, we completely changed the way the stairs into the basement looked. Eventually, I plan to add a farmhouse style steel banister and railing, but for now I love the open staircase.
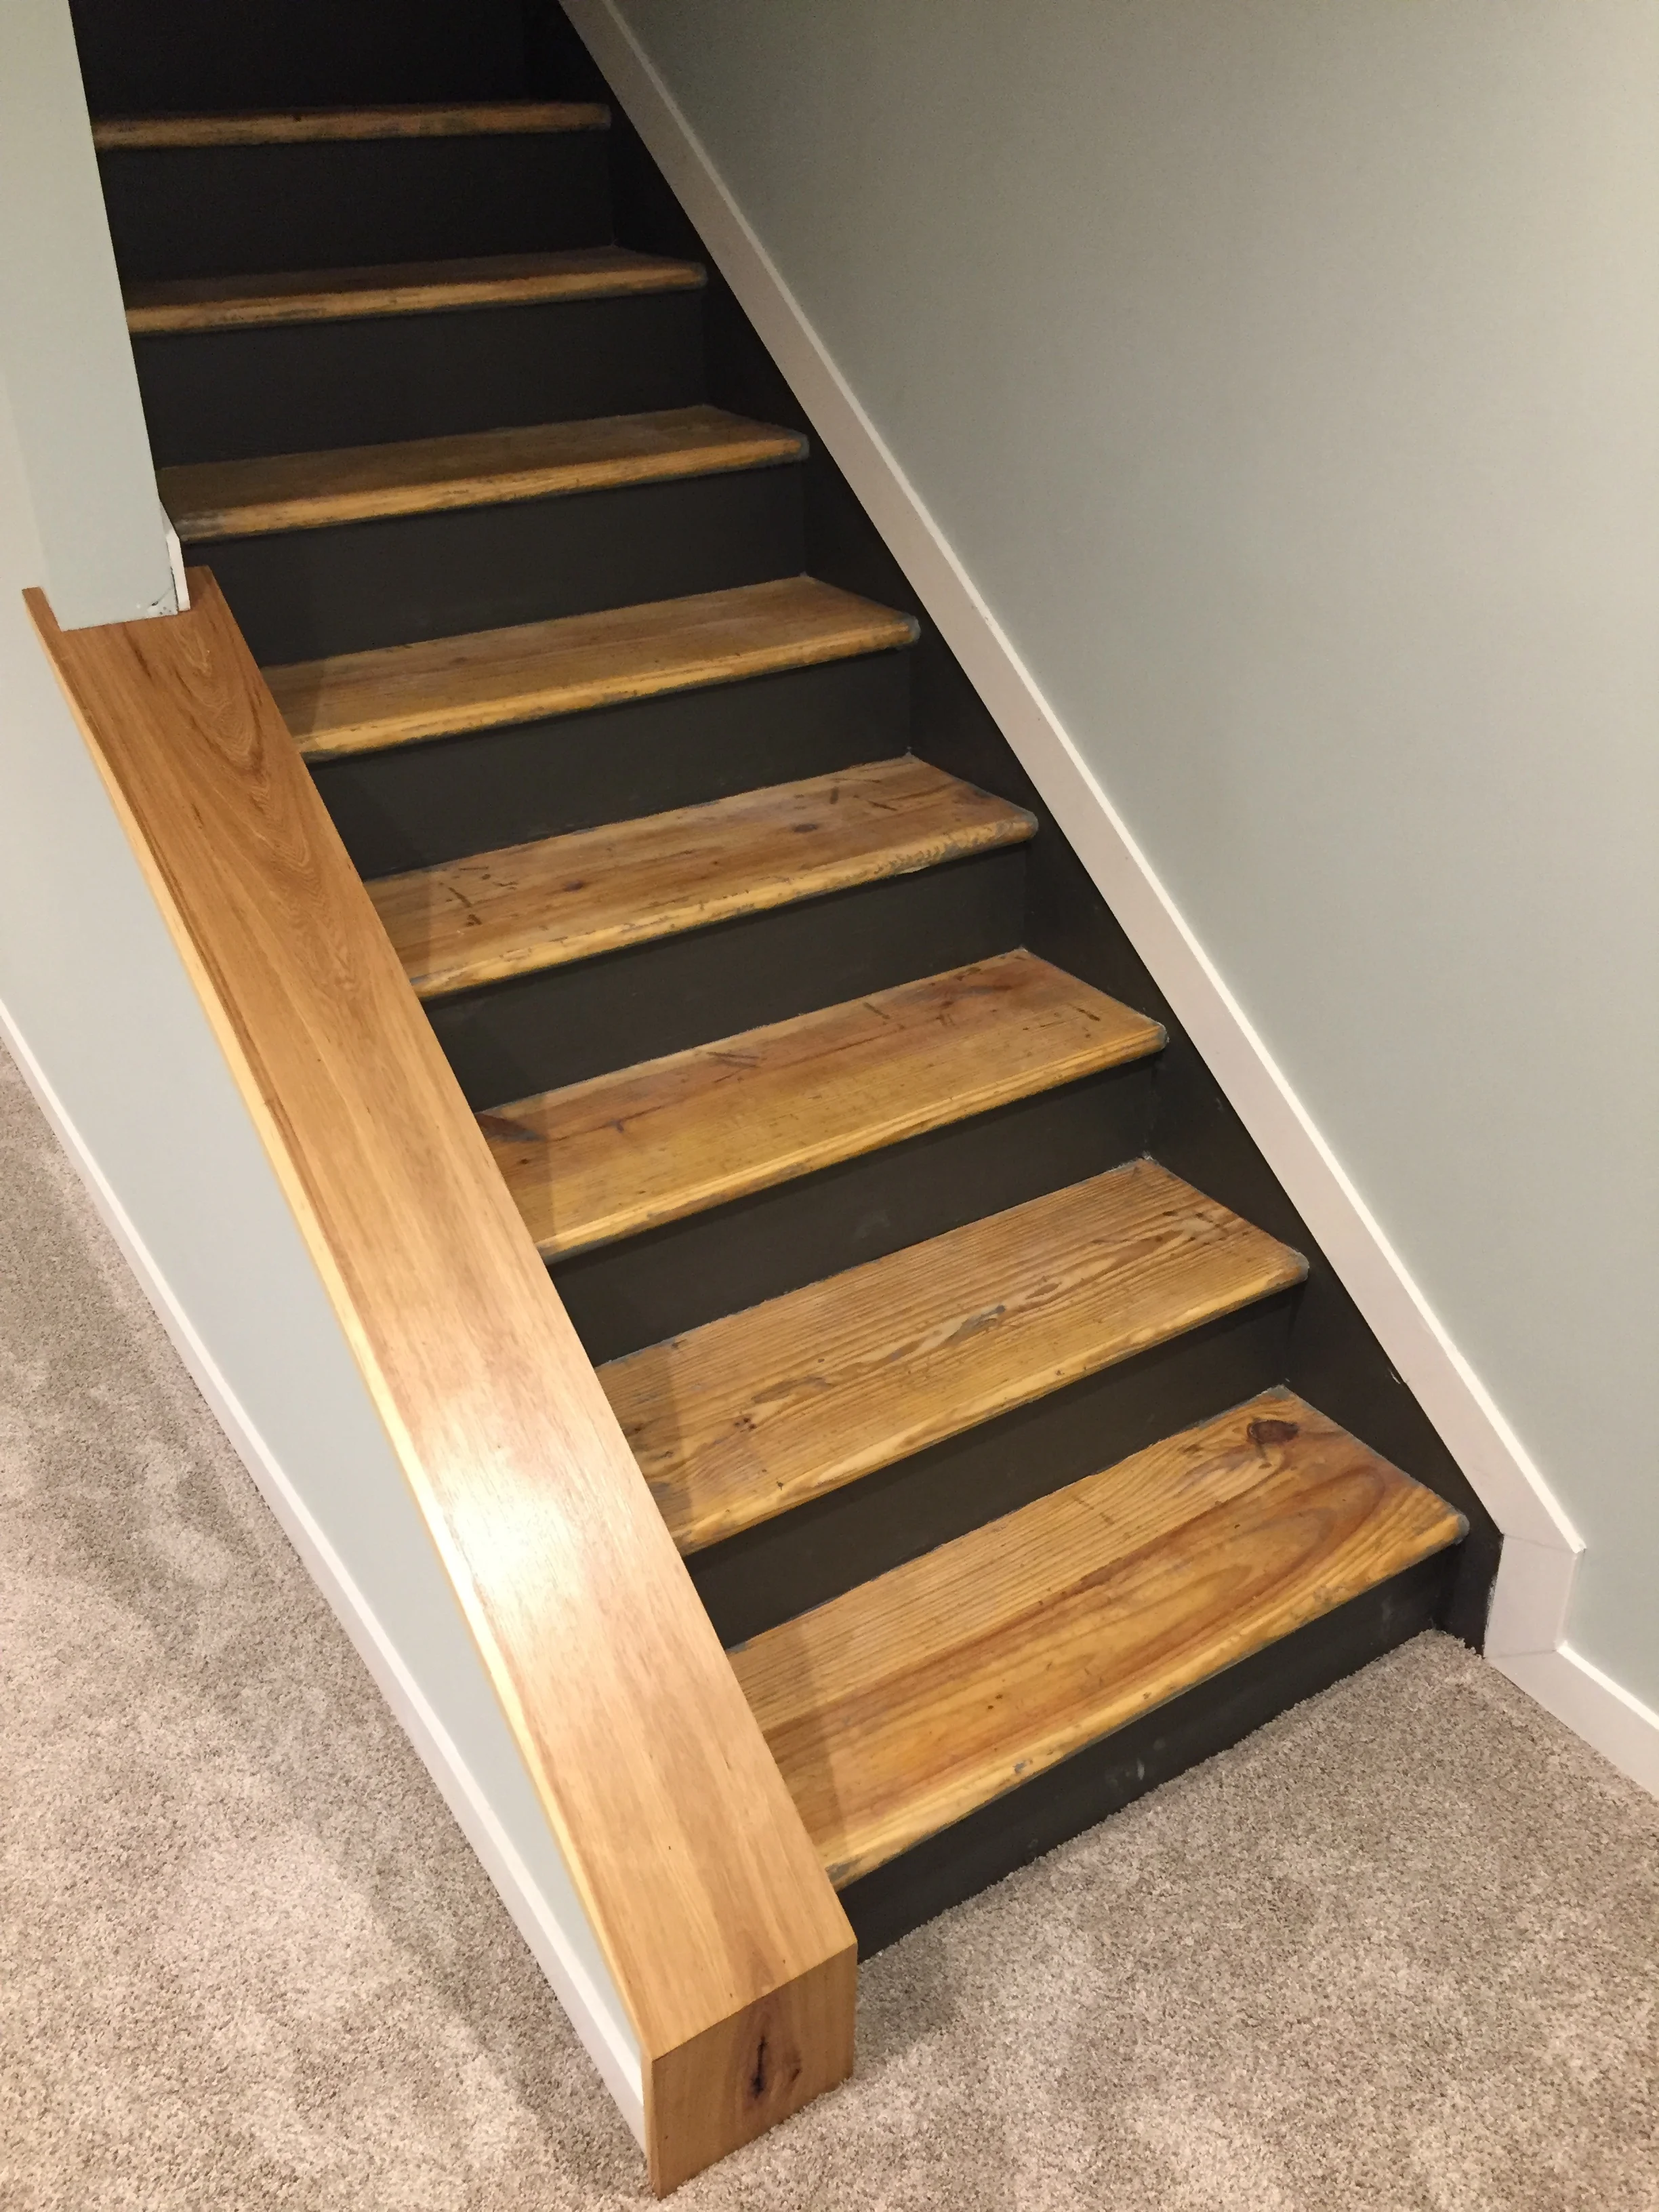
Completed Staircase makeover